Of course! Here is a much larger, more detailed, and comprehensive version of your Strawberry Crunch Cheesecake recipe, expanded to include all the sections you requested.
—
🍓 The Ultimate Strawberry Crunch Cheesecake: A Symphony of Creamy, Fruity, and Crunchy Delights 🍓
Introduction
Welcome to the baking project that will elevate your dessert game to legendary status. This Strawberry Crunch Cheesecake is not just a dessert; it’s an experience. It masterfully combines the rich, tangy creaminess of a classic New York-style cheesecake with the vibrant, sweet-tart burst of strawberries, all finished with a buttery, golden Oreo crunch that provides the perfect textural contrast. This recipe is a celebration of flavors and textures, designed to impress at any gathering or to satisfy a deeply specific cheesecake craving. Prepare to create a show-stopping centerpiece that is as beautiful as it is delicious.
—
📜 A Slice of History
The cheesecake itself is an ancient dessert, with roots tracing back to ancient Greece. The first recorded mention was as a source of energy for athletes at the first Olympic Games in 776 BC. The modern, creamy cheesecake we know and love today evolved in America with the invention of cream cheese in the late 19th century.
The “Strawberry Crunch” concept is a more recent, American innovation, famously inspired by the nostalgic Strawberry Shortcake Ice Cream Bars. These frozen treats, with their vanilla ice cream, strawberry coating, and crunchy cookie shell, captured the hearts of a generation. This cheesecake is a gourmet, homemade homage to that beloved flavor combination, transforming a simple frozen novelty into an elegant, sophisticated dessert.
—
🥧 Ingredients Formation
Understanding the role of each ingredient is key to baking success. Here’s what you’ll need, organized by component:
For the Crust & Crunch Topping:
· 2 cups crushed golden Oreos: These provide a sweet, vanilla-flavored base that is distinct from chocolate Oreos, allowing the strawberry flavor to shine.
· 6 tbsp unsalted butter, melted: The binding agent that holds the crust together and creates its “sand-like” texture. Using unsalted allows you to control the salt level.
· Extra 1/2 cup crushed golden Oreos (for topping): Reserved for the final crunchy layer.
For the Cheesecake Filling:
· 24 oz (680 g) cream cheese, softened: The star of the show. Use full-fat for the creamiest texture. Softening is non-negotiable for a lump-free batter.
· 1 cup granulated sugar: Sweetens the filling without adding other flavors.
· 3 large eggs, at room temperature: Provide structure and richness. Room temperature eggs incorporate more smoothly, preventing overmixing.
· 1/2 cup sour cream: The secret weapon for tanginess and an incredibly silky, moist texture.
· 1 tsp vanilla extract: Enhances all the other flavors in the filling.
· 2 tbsp all-purpose flour: A stabilizer that helps prevent cracking and gives the cheesecake a slight firmness.
For the Strawberry Layer:
· 1 ½ cups high-quality strawberry topping or jam: Provides a smooth, concentrated strawberry layer. Look for ones with real fruit.
· 1 cup fresh strawberries, diced: Adds fresh, juicy bursts of real fruit and a beautiful visual element.
—
👩🍳 Step-by-Step Instructions & Methods
Method 1: Preparing the Pan and Crust
1. Preheat and Prep: Preheat your oven to 350°F (175°C). Take a 9-inch springform pan and wrap the bottom and sides tightly with a double layer of heavy-duty aluminum foil. This is a crucial step to prevent water from seeping in during the water bath (optional but recommended).
2. Create the Crust: In a medium bowl, combine the 2 cups of finely crushed golden Oreos with the 6 tablespoons of melted butter. Mix until the mixture resembles wet sand and all the crumbs are moistened.
3. Form the Base: Transfer the mixture to the springform pan. Using the bottom of a flat glass or measuring cup, press the crumbs firmly and evenly into the bottom of the pan.
4. Pre-bake: Bake the crust for 8 minutes. This step “sets” the crust, preventing it from becoming soggy. Remove from the oven and let it cool while you prepare the filling. Reduce the oven temperature to 325°F (160°C).
Method 2: Creating the Creamy Filling
1. Cream the Base: In the large bowl of a stand mixer fitted with a paddle attachment (or using a hand mixer), beat the softened cream cheese on medium speed until it is completely smooth, creamy, and free of lumps. Scrape down the bowl and beater(s) thoroughly.
2. Incorporate Sugar: Gradually add the granulated sugar and beat on medium-low speed until the mixture is fluffy and well-combined. Scrape the bowl again.
3. Add Eggs Gently: Add the eggs one at a time, mixing on low speed only until the yolk disappears after each addition. Overmixing at this stage incorporates too much air and can cause the cheesecake to puff up and crack.
4. Final Flavor and Texture: With the mixer on low, add the sour cream, vanilla extract, and all-purpose flour. Mix just until the batter is smooth and uniform. Do not overmix.
Method 3: The Baking and Cooling Process
1. Assemble for Baking: Pour the finished filling over the cooled crust. Smooth the top with an offset spatula.
2. Water Bath (Recommended): Place the foil-wrapped springform pan into a larger roasting pan. Carefully pour hot water into the roasting pan until it comes about halfway up the sides of the springform pan. This water bath creates a steamy environment, ensuring gentle, even heat that prevents cracking and delivers a supremely creamy texture.
3. Bake: Carefully transfer the pans to the oven and bake at 325°F (160°C) for 55-65 minutes. The cheesecake is done when the edges are set but the center still has a slight jiggle—like Jell-O—when you gently shake the pan.
4. Cool Gradually: Turn off the oven, crack the oven door open about an inch, and let the cheesecake cool slowly inside the oven for 1 hour. This gradual temperature change is the second key to preventing cracks.
5. Chill Thoroughly: Remove the cheesecake from the water bath and let it cool to room temperature on a wire rack. Then, refrigerate it, uncovered, for at least 4 hours, but preferably overnight. This allows the flavors to meld and the texture to become perfectly sliceable.
Method 4: The Grand Finale – Topping & Assembly
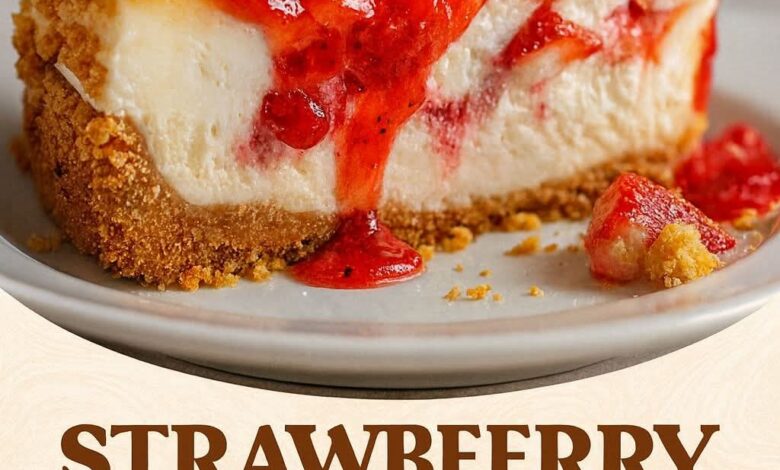
1. Apply Strawberry Layer: Once the cheesecake is completely chilled, carefully run a thin knife around the edge of the springform pan before releasing the clamp. Spread the strawberry topping or jam in an even layer over the surface of the cheesecake.
2. Add Crunch and Freshness: Sprinkle the reserved 1/2 cup of crushed golden Oreos around the outer edge of the cheesecake, creating a “crunch frame.” Pile the diced fresh strawberries in the center for a beautiful, fresh contrast.
3. Serve: Use a sharp, thin-bladed knife to slice. Dip the knife in hot water and wipe it clean between each slice for perfectly clean cuts.
—
📊 Nutrition & Benefits
A Note on Nutrition: As a decadent dessert, this cheesecake is a treat to be enjoyed in moderation. It is energy-dense, rich in sugars and fats. However, we can find some bright spots:
· Calcium & Protein: Thanks to the cream cheese, sour cream, and eggs, it provides a source of calcium and protein.
· Vitamin C: The fresh strawberries contribute a dose of Vitamin C and antioxidants.
· Joy is a Benefit: Never underestimate the mental health benefit of enjoying a lovingly made, beautiful dessert with people you care about. The joy and satisfaction it brings are invaluable.
—
❤️ For the Lovers of Dessert
This Strawberry Crunch Cheesecake is for the lovers:
· The Nostalgic Lover who remembers the joy of a strawberry ice cream bar.
· The Texture Lover who craves the contrast of creamy, crunchy, and juicy.
· The Impressive Baker who wants a dessert that looks and tastes professionally made.
· The Cheesecake Purist who is looking for a delightful and flavorful twist on a classic.
—
✅ Conclusion
From its ancient origins to its modern, playful inspiration, this Strawberry Crunch Cheesecake is a testament to the evolution of dessert. While it requires patience and attention to detail, the process is a rewarding journey, and the result is nothing short of spectacular. Each component—the buttery crust, the impossibly creamy filling, the fruity strawberry layer, and the signature crunch—works in perfect harmony. So, gather your ingredients, embrace the methods, and prepare to create a dessert memory that will have everyone asking for the recipe. Slice, serve, and bask in the well-deserved compliments. 😍🍰