Of course! This is a fantastic recipe, and its story is as rich as its flavor. Here is a comprehensive, big recipe breakdown for the legendary Mississippi Mud Pie, exactly as you’ve requested.
—
Introduction
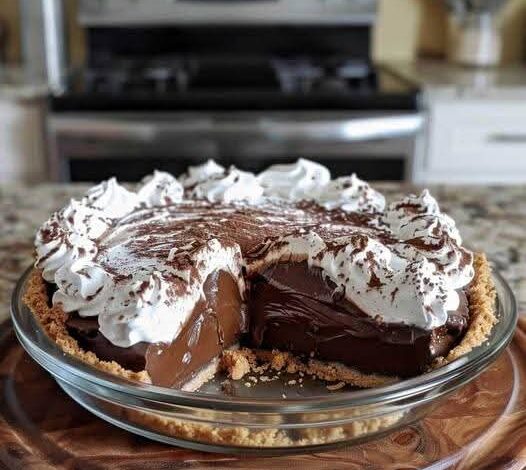
This is the recipe for the dessert that feels like a warm, Southern hug. My Mississippi friend brought this to a potluck, and from the first fudgy, creamy, chaotic bite, it was an instant classic. It’s not a dainty, perfectly sculpted slice; it’s a glorious mess of textures and temperatures—a crunchy chocolate crust, a dense, almost brownie-like cake, a cool, pillow-soft layer of cream, and a final sprinkle of crunch. It’s the kind of dessert that makes people close their eyes and sigh with happiness. It embodies the spirit of Southern hospitality: generous, unpretentious, and deeply satisfying.
—
The History: Where the “Mud” Got Its Name
The name “Mississippi Mud Pie” is believed to have originated in the American South in the 1970s. The inspiration is purely visual: the dense, dark layers of chocolate cake and pudding are meant to resemble the thick, dark mud along the banks of the mighty Mississippi River. Early versions were often made with a crumb crust and a filling that was not baked but set in the refrigerator, mimicking the gooey mud of a riverbank after a rain. Over time, it evolved into the multi-layered masterpiece we know today, a testament to the American love affair with chocolate.
—
The Formation: A Layer-by-Layer Deconstruction
A true Mississippi Mud Pie is an architectural delight of contrasting layers:
1. The Foundation: A sturdy, buttery chocolate cookie crust.
2. The Mud Core: A rich, dense, and fudgy baked chocolate layer.
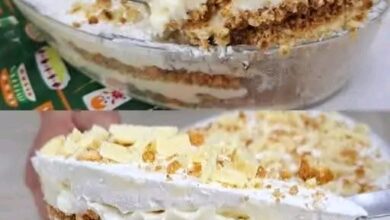
3. The Cream Layer: A smooth, cool, and sweet whipped cream or cream cheese layer, representing the “moss” on the riverbank.
4. The Topping: A final garnish of chocolate shavings, chopped nuts, or more cookie crumbs for texture.
—
The Ingredients
For the Chocolate Crust:
· 1 ½ cups chocolate cookie crumbs (from about 20 Oreo cookies, filling included)
· 5 tablespoons unsalted butter, melted
· 1 tablespoon granulated sugar
For the Fudgy Brownie Layer:
· ½ cup (1 stick) unsalted butter
· 4 ounces high-quality semi-sweet chocolate, chopped
· ¾ cup granulated sugar
· 2 large eggs, at room temperature
· 1 teaspoon vanilla extract
· ¼ cup all-purpose flour
· ¼ teaspoon salt
For the Cream Cheese Layer:
· 8 ounces (1 block) full-fat cream cheese, softened to room temperature
· 1 cup powdered sugar
· 1 teaspoon vanilla extract
· 1 ½ cups heavy whipping cream, cold
For the Topping:
· ½ cup chocolate shavings or mini chocolate chips
· ¼ cup chopped pecans or walnuts (optional)
—
The Methods & Instructions
Part 1: The Chocolate Crust
1. Preheat and Prep: Preheat your oven to 350°F (175°C).
2. Make Crumbs: Pulse the chocolate cookies in a food processor until they form fine crumbs. Alternatively, place them in a sturdy zip-top bag and crush with a rolling pin.
3. Combine: In a medium bowl, mix the cookie crumbs, melted butter, and sugar until it resembles wet sand.
4. Form the Crust: Press the mixture firmly and evenly into the bottom and up the sides of a 9-inch pie dish.
5. Pre-Bake: Bake for 8-10 minutes. Remove from the oven and let it cool while you prepare the next layer. Reduce oven temperature to 325°F (163°C).
Part 2: The Fudgy Brownie Layer
1. Melt Chocolate and Butter: In a heatproof bowl set over a pot of simmering water (a double boiler), melt the butter and chopped chocolate together, stirring until smooth. Alternatively, microwave in 30-second bursts, stirring each time. Let it cool slightly.
2. Whisk Wet Ingredients: In a separate bowl, whisk the sugar, eggs, and vanilla extract until combined.
3. Combine: Slowly whisk the slightly cooled chocolate mixture into the egg mixture until smooth.
4. Add Dry Ingredients: Gently fold in the flour and salt until just combined. Do not overmix.
5. Bake: Pour the batter into the cooled crust. Bake at 325°F for 25-30 minutes, or until the top is set and a toothpick inserted into the center comes out with a few moist crumbs.
6. Cool Completely: This is crucial! Allow the pie to cool completely on a wire rack. The center will sink slightly as it cools, which is perfect for holding the next layer.
Part 3: The Cream Cheese Layer
1. Whip the Cream: In a large, cold bowl, use an electric mixer to beat the cold heavy whipping cream until stiff peaks form. Set aside.
2. Cream the Cheese: In another bowl, beat the softened cream cheese, powdered sugar, and vanilla extract until completely smooth and creamy.
3. Fold Together: Gently fold the whipped cream into the cream cheese mixture in two additions until no white streaks remain. Be careful not to deflate the mixture.
4. Assemble: Spread the cream cheese layer evenly over the completely cooled brownie layer, filling the sunken center.
Part 4: The Final Formation
1. Chill: Cover the pie with plastic wrap and refrigerate for at least 4 hours, but ideally overnight. This allows the flavors to meld and the pie to set perfectly for slicing.
2. Garnish: Just before serving, sprinkle with chocolate shavings and chopped nuts.
—
Nutrition & The Benefits (A Balanced View)
Let’s be honest: this is a celebratory dessert.
· Nutrition (Approximate per slice): Calories: 550-650, Fat: 40g, Carbohydrates: 50g, Sugar: 40g, Protein: 6g.
· The Benefits:
· Mood Enhancer: Chocolate contains compounds that can trigger the release of endorphins, the “feel-good” hormones.
· Social Connection: Sharing a dessert like this fosters community and joy, which is vital for mental well-being.
· Energy Dense: It provides a quick source of energy, perfect for a special treat after a long day or during a celebration.
· Calcium & Protein: The dairy components (cream cheese, whipping cream) provide a source of calcium and protein.
—
For the Lovers: Who This Pie is For
This pie is for the true dessert enthusiast. It’s for:
· The Chocolate Devotee: If you believe there’s no such thing as too much chocolate, this is your holy grail.
· The Texture Seeker: Those who love the interplay of crunchy, creamy, chewy, and soft in one bite.
· The Comfort Food Craver: It’s the edible equivalent of a cozy blanket on a rainy day.
· The Impress-Your-Guests Host: It looks spectacular with minimal finishing effort and guarantees recipe requests.
· Anyone who appreciates a dessert with a story and a whole lot of soul.
—
Conclusion
Mississippi Mud Pie is more than just a list of ingredients and steps; it’s an experience. It’s a dessert that doesn’t ask for perfection but delivers maximum impact through its bold, unapologetic layers of flavor and texture. From its humble, muddy namesake to its status as a potluck superstar, this pie carries with it a warmth and generosity that is truly Southern. Making it is a labor of love, and sharing it is an even greater joy. So, gather your ingredients, embrace the process, and get ready to make a glorious, delicious mess. One bite, and you’ll understand why it was an instant hit.