Of course! Here is a comprehensive, “big” recipe for the beloved Pão de Queijo (Brazilian Cheese Bread), complete with all the sections you requested.
Introduction
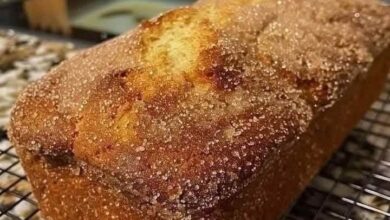
Welcome to the world of Pão de Queijo (pronounced pown-dee-KAY-zhoo), a delectable, gluten-free cheese bread that is a cornerstone of Brazilian cuisine. Imagine a bite-sized morsel with a delightfully chewy, slightly elastic interior, a crispy, golden-brown exterior, and an irresistible, cheesy aroma. Unlike traditional bread, Pão de Queijo is made with tapioca flour, giving it a unique texture that is both light and satisfyingly substantial. It’s the perfect snack for any time of day, from breakfast to a party appetizer, and is surprisingly simple to make.
A Brief History
Pão de Queijo’s origins are rooted in the culinary traditions of 18th-century Minas Gerais, a Brazilian state known for its dairy and mining industries. As the potato was not widely available in Brazil at the time, cooks used cassava (also known as yuca or manioc) in their recipes. The starchy byproduct of processing cassava is tapioca flour.
Enslaved Africans and Indigenous peoples in the region began creating a simple bread by mixing the moist tapioca starch (or polvilho azedo) with water and cheese, typically the leftover rinds and hard cheeses from the farm. This resourceful recipe evolved over centuries into the beloved Pão de Queijo we know today. It moved from a regional specialty to a national treasure in the mid-20th century and is now gaining global popularity.
The Benefits & Unique Formation
· Naturally Gluten-Free: The primary ingredient, tapioca flour, contains no gluten, making this a fantastic option for those with celiac disease or gluten sensitivity.
· Digestive Friendliness: Tapioca is known for being easy to digest.
· Energy Boost: Tapioca is a source of carbohydrates, providing a quick source of energy.
· The “Formation” (The Science of the Texture): The unique chewy and airy texture comes from the properties of tapioca starch. When hydrated with liquid and fat (like milk, oil, and eggs) and then baked, the starch gelatinizes. The steam from the liquid and the leavening from the eggs create pockets of air, resulting in a puffed-up, hollow, and wonderfully chewy bread. The cheese adds flavor and also contributes to the browning and crisp exterior.
Ingredients
(Yields approximately 24-30 small breads)
The Dry Components:
· 2 cups (250g) Tapioca Flour (also called tapioca starch) – This is the essential ingredient. Do not substitute.
· 1 tsp Salt
The Wet & Fatty Components:
· 1 cup Whole Milk
· ½ cup Vegetable Oil (or light olive oil)
· 2 large Eggs, at room temperature
The Flavor & Structure:
· 1 ½ cups (150g) finely grated Parmesan Cheese (authentic and highly recommended)
· ½ cup (50g) finely grated Mozzarella Cheese (for extra stretch and mild flavor)
· Optional Add-ins: 1-2 cloves minced garlic, a pinch of black pepper, or chopped fresh herbs like chives.
Instructions & Methods
Method 1: The Traditional Stovetop & Mix Method
This is the classic method that ensures the tapioca flour is properly hydrated.
1. Preheat and Prepare: Preheat your oven to 400°F (200°C). Line a baking sheet with parchment paper.
2. Heat the Liquids: In a medium saucepan, combine the milk, oil, and salt. Heat over medium heat until it just comes to a gentle boil.
3. Cook the Dough: Immediately remove the pan from the heat. Add the entire 2 cups of tapioca flour all at once and stir vigorously with a wooden spoon until a smooth, thick dough forms and pulls away from the sides of the pan. It will look like a sticky, gelatinous mass. This is normal!
4. Cool the Dough: Transfer the hot dough to the bowl of a stand mixer fitted with a paddle attachment. Alternatively, you can use a wooden spoon and a lot of elbow grease. Let the dough cool for about 5-10 minutes; it should be warm but not hot enough to cook the eggs.
5. Incorporate Eggs and Cheese: With the mixer on medium speed (or by hand), add the eggs, one at a time, beating thoroughly until each egg is fully incorporated and the dough is smooth. The dough may look slippery and broken at first, but keep mixing until it becomes smooth and sticky again. Scrape down the sides as needed.
6. Add the Cheese: Reduce the mixer speed to low and add both the Parmesan and Mozzarella cheeses. Mix until the cheese is evenly distributed throughout the dough.
7. Shape the Breads: The dough will be soft, sticky, and stretchy. To handle it easily, lightly oil your hands. Scoop out about 1 tablespoon of dough and roll it into a smooth ball between your palms. Place the balls on the prepared baking sheet, spacing them about 1-2 inches apart.
8. Bake to Perfection: Bake for 15-20 minutes, or until the puffs are puffed up, lightly golden, and firm to the touch. Do not open the oven door before the 15-minute mark, as they may deflate.
9. Serve: Enjoy immediately while warm and delightfully chewy!
Method 2: The Blender Method (Quick & Easy)
This is a fantastic shortcut that yields great results with less effort.
1. Preheat: Preheat oven to 400°F (200°C). Line a baking sheet with parchment paper.
2. Combine in Blender: Add the milk, oil, eggs, and salt to a blender. Blend on low for a few seconds to combine.
3. Add Flour and Cheese: With the blender running on low, gradually add the tapioca flour through the opening in the lid. Once incorporated, add the grated cheeses and blend until a smooth, runny batter forms.
4. Pour and Bake: Pour the batter directly into the wells of a mini-muffin tin (greased if not non-stick), filling each about ¾ full. Alternatively, you can let the batter rest for 10-15 minutes to thicken slightly and then scoop with an oiled spoon onto a baking sheet.
5. Bake: Bake for 15-20 minutes until puffed and golden.
Nutritional Information (Per Serving – 1 bread, approx.)
· Calories: ~80 kcal
· Carbohydrates: 8g
· Protein: 3g
· Fat: 4g
· Saturated Fat: 1.5g
· Cholesterol: 15mg
· Sodium: 120mg
· Fiber: 0g
· Note: Values are approximate and can vary based on specific ingredients used.
For the Lovers of Pão de Queijo
This bread is incredibly versatile and appeals to a wide audience.
· The Purist Lover: Serve them warm, straight from the oven, with a strong black coffee (cafézinho) for an authentic Brazilian experience.
· The Dipper Lover: Pair them with marinara sauce, a spicy chimichurri, or a creamy spinach and artichoke dip.
· The Hearty Meal Lover: Split them open and fill with sliced ham, roast beef, or use them as a bun for sliders.
· The Sweet Lover: While traditionally savory, a sweet version can be made by omitting the cheese and salt and adding a tablespoon of sugar and a dash of vanilla extract. Roll the baked puffs in cinnamon sugar.
Conclusion
Pão de Queijo is more than just a recipe; it’s a taste of Brazilian culture and history. Its magical transformation from a simple, sticky dough into puffy, golden clouds of cheesy goodness never fails to impress. With its naturally gluten-free nature, simple ingredient list, and utterly addictive quality, it’s a recipe that deserves a place in every home cook’s repertoire. So, gather your ingredients, embrace the sticky dough, and get ready to fall in love with one of the world’s most delightful breads. Bom apetite!