You know a recipe is a keeper when it disappears as fast as this one did for a happy cook, who shared, “Made this tonight and my hubby and I ate almost half of it, just the two of us! I’m sure the rest won’t last past breakfast.” That is the ultimate testament to a truly irresistible dessert. This cake is for those who believe there’s no such thing as too much chocolate—a rich, moist, and deeply flavorful layer cake that promises pure indulgence in every single bite.
Whether you are celebrating a special occasion or simply satisfying a deep chocolate craving, this cake is your answer. It features a tender crumb packed with cocoa flavor, slathered in a luscious, creamy chocolate frosting. It’s the kind of dessert that turns a simple evening into a memorable event and has everyone reaching for a second slice .
📜 A Bite of History
The journey of chocolate cake is a fascinating one, mirroring the evolution of chocolate itself. It all began in the 17th century when cocoa powder from the Americas first made its way into European kitchens, being added to traditional cake recipes . For a long time, chocolate was primarily enjoyed as a drink, and its role in baking was limited to fillings and glazes.
The game-changer came in 1828 when Dutch chemist Coenraad van Houten invented a press to extract cocoa butter from roasted cacao beans, leaving behind a fine powder that was much easier to mix into batters. This process, known as “Dutching,” made chocolate more accessible and affordable . Later, in 1879, Rodolphe Lindt’s invention of the conching machine in Switzerland created a smoother, more luxurious chocolate that blended seamlessly into cake batters, paving the way for the decadent desserts we know and love today .
By the late 19th century, American cooks began incorporating chocolate directly into their cake batters, creating the first true chocolate cakes. The 20th century saw the rise of iconic versions like Devil’s Food cake and, eventually, the ultra-rich “chocolate decadence” cakes that became popular in the 1980s .
🛒 Ingredients
Here is everything you need to create this masterpiece. For the best results, use quality ingredients.
For the Decadent Chocolate Cake:
· 1 ¾ cups (220g) all-purpose flour
· 2 cups (400g) granulated sugar
· ¾ cup (90g) unsweetened cocoa powder (natural or Dutch-processed)
· 1 ½ teaspoons baking powder
· 1 ½ teaspoons baking soda
· 1 teaspoon salt
· 2 large eggs, at room temperature
· 1 cup (240ml) whole milk, at room temperature
· ½ cup (120ml) vegetable oil
· 2 teaspoons vanilla extract
· 1 cup (240ml) boiling water
For the Luscious Chocolate Frosting:
· 1 cup (2 sticks or 226g) unsalted butter, softened
· 1 ½ cups (90g) unsweetened cocoa powder, sifted
· 4-5 cups (480-600g) powdered sugar, sifted
· ½ cup (120ml) milk or heavy cream (plus more if needed)
· 2 teaspoons vanilla extract
· A pinch of salt
👩🍳 Method & Instructions
Follow these steps for a flawless, bakery-worthy cake.
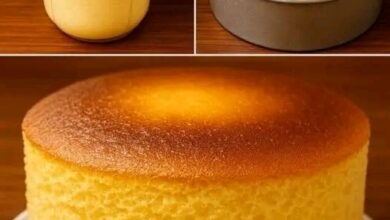
Step 1: Prepare for Baking
Preheat your oven to 350°F (175°C). Grease the bottoms and sides of two 9-inch round cake pans. Line the bottoms with parchment paper rounds for easy removal, then dust the pans lightly with cocoa powder or flour, tapping out the excess .
Step 2: Combine Dry Ingredients
In a large mixing bowl, whisk together the flour, granulated sugar, cocoa powder, baking powder, baking soda, and salt. Whisking ensures that the leavening agents and cocoa are evenly distributed .
Step 3: Mix Wet Ingredients
Add the eggs, milk, vegetable oil, and vanilla extract to the dry ingredients. Beat with an electric mixer on medium speed for about 2 minutes, until the batter is well combined and smooth .
Step 4: Add the Boiling Water
This is the key step for a moist cake. Gradually pour in the boiling water while mixing on low speed. The batter will be very thin and liquidy—that’s perfectly normal. This process helps “bloom” the cocoa powder, intensifying its deep chocolate flavor .
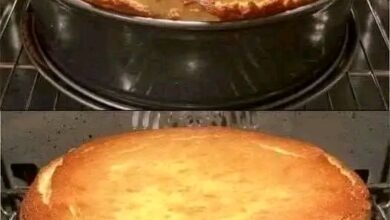
Step 5: Bake the Layers
Pour the thin batter evenly into the two prepared pans. Bake for 30 to 35 minutes, or until a toothpick inserted into the center comes out clean or with a few moist crumbs . Let the cakes cool in their pans on a wire rack for about 10-15 minutes. Then, run a knife around the edges and invert them onto the rack to cool completely. Do not frost until the layers are 100% cool .
Step 6: Make the Frosting
While the cakes cool, make the frosting. In a large bowl, beat the softened butter with an electric mixer until it’s creamy and smooth, about 2 minutes .
Gradually add the sifted cocoa powder and powdered sugar, alternating with splashes of milk or cream. Begin mixing on low speed to avoid a sugar cloud, then increase to medium-high and beat until the frosting is light, fluffy, and spreadable. Beat in the vanilla extract and a pinch of salt .
Step 7: Assemble the Cake
Place one completely cooled cake layer on your serving plate. Use an offset spatula to spread a generous layer of frosting evenly over the top. Place the second layer on top, then apply a thin “crumb coat” of frosting all over the cake to seal in any loose crumbs. Refrigerate for 15-20 minutes to set the crumb coat. Finally, frost the top and sides with the remaining frosting, creating beautiful swirls .
✨ Tips for Success
· Room Temperature Ingredients: Ensure your eggs and milk are at room temperature for a batter that emulsifies properly, leading to a better texture.
· Don’t Overmix: Once you add the flour, mix just until combined. Overmixing develops the gluten, which can make the cake tough.
· Leveling Layers: If your cakes have domed tops, use a serrated knife to gently slice off the dome. This creates a flat surface for stacking .
· Check for Doneness: Ovens vary, so start checking your cakes at the 25-minute mark.
📊 Nutritional Information
A slice of this indulgent cake is a wonderful treat. The following is an estimated value for one slice (based on 14 servings) and can vary based on specific ingredients used.
Nutrient Approximate Amount Per Serving
Calories 370-400 kcal
Total Fat 18-20 g
Saturated Fat 6-8 g
Carbohydrates 51-55 g
Dietary Fiber 2-3 g
Sugars 42-45 g
Protein 3-4 g
Sodium 180-200 mg
Source: Based on nutritional analysis of similar decadent chocolate cakes .
🌿 The (Moderate) Health Benefits of Chocolate
While this cake is undoubtedly a dessert to be enjoyed in moderation, its key ingredient, cocoa, does have some interesting health associations when consumed in its purer forms. Here are some insights:
· Rich in Flavonoids: Cocoa beans are packed with flavonoids, which are powerful antioxidants. These compounds have been linked to potential anti-inflammatory properties and may help improve blood flow .
· Cardiovascular Health: Studies have suggested that moderate consumption of dark chocolate (which has a high cocoa content) may be associated with favorable effects on blood pressure and cholesterol levels .
· Cognitive Function: Some research has indicated a link between habitual chocolate consumption and better performance on cognitive tests in older adults. However, more research is needed to confirm a direct cause-and-effect relationship .
· A Note of Caution: The closer a product is to the original cocoa bean, the more beneficial compounds it contains. However, in a cake, these benefits are outweighed by the added sugar and fat. As experts advise, eat chocolate for joy, not for health benefits, and always in moderation .
💕 For the Love of Chocolate Cake
This cake is more than just a recipe; it’s an experience. It’s the star of birthday parties, the comfort on a rainy day, and the ultimate expression of “I love you.” It brings people together, creating moments of shared joy and blissful silence as everyone digs in. As one reviewer perfectly put it, when a cake is this good, it barely lasts until breakfast . It’s a testament to the simple, profound pleasure that a truly perfect slice of chocolate cake can bring. So go ahead, preheat your oven, and bake some love today.
❓ Frequently Asked Questions
1. Can I use Dutch-processed cocoa powder?
Yes, you can. If your recipe does not include a leavening agent that reacts with acid (like baking soda), you may need to adjust slightly, but for this recipe, either works beautifully. Dutch-processed will yield a slightly milder, more mellow chocolate flavor .
2. Can I make this cake dairy-free?
Absolutely. Substitute the whole milk with your favorite unsweetened plant-based milk (like almond, soy, or oat milk) and use a vegan butter alternative in the frosting .
3. Why is my cake dry?
The most common reason for a dry cake is overbaking. Oven temperatures can vary, so start checking for doneness a few minutes before the recipe’s suggested time .
4. Can I bake this in a 9×13 inch pan instead?
Yes. You can pour the batter into a greased and floured 9×13 inch pan. The baking time will be different; start checking around 35-40 minutes .
5. How should I store the leftover cake?
Store the cake covered at room temperature for up to 2 days. For longer storage, keep it in the refrigerator for 4-5 days. Be sure to bring refrigerated slices to room temperature before serving for the best flavor and texture .
6. Can I freeze this cake?
Yes! It’s best to freeze the cake layers unfrosted. Wrap each cooled layer tightly in plastic wrap and then foil. They can be frozen for up to 3 months. Thaw overnight in the refrigerator before frosting .
7. Can I add chocolate chips to the batter?
For even more chocolatey bursts, you can gently fold about ½ cup of semi-sweet chocolate chips into the finished batter just before pouring it into the pans .
8. Why is my frosting too thick or too thin?
If your frosting is too thick, add a splash more milk or cream and beat again. If it’s too thin, it may be because the butter was too soft. Try refrigerating it for 15-20 minutes to firm up before beating again.
9. Can I use this recipe to make cupcakes?
Yes. Line a muffin tin with paper liners and fill them about ⅔ full. Bake at 350°F (175°C) for 18-22 minutes, or until a toothpick comes out clean .
10. How do I get my cake layers to bake flat?
For perfectly flat layers, you can use “cake strips”—insulated bands that you wrap around your cake pans. Alternatively, you can simply let the cake cool and slice the domed top off with a serrated knife .