Absolutely! Here is a comprehensive guide to the delightful Cookie Icebox Cake, covering everything from its rich history to a step-by-step guide on how to make it, ensuring a perfect dessert every time.
Introduction
If you’re looking for a dessert that is as impressive as it is effortless, look no further than the Cookie Icebox Cake. This is a no-bake wonder that transforms simple, store-bought cookies and luscious whipped cream into a decadent, cake-like treat. The magic happens in the refrigerator (formerly known as the icebox), where the crispy cookies slowly absorb moisture from the cream, softening into tender, layered “cake” . It’s a perfect dessert for summer parties, holiday gatherings, or any time you want to create a stunning dessert without turning on the oven . With endless variations, it’s a recipe that invites creativity and guarantees a smile with every single slice.
History
The icebox cake is a beloved American classic with roots stretching back to the early 20th century. Its creation was a perfect convergence of new technology and clever marketing . As refrigerators became common household appliances in the 1920s and 30s, they were often called “iceboxes,” a holdover from the days of actual ice blocks. At the same time, food companies like Nabisco began packaging cookies, such as the Famous Chocolate Wafer, often with recipes printed right on the box to inspire home cooks .
Newspaper food columnists of the era began developing recipes using these “boughten” cookies, creating what they called “shivery icebox cakes.” The idea was simple and revolutionary: by layering the dry, crispy cookies with whipped cream and letting them rest in the new electric icebox, the cookies would soften into a cake-like texture. By the 1950s, the icebox cake had become the “darling of the dessert table,” a testament to American ingenuity and the love for easy, comforting sweets . Its culinary ancestors can be traced back even further to European desserts like the French charlotte (made with ladyfingers) and the English trifle .
Benefits
Why choose a Cookie Icebox Cake? Here are just a few compelling reasons:
· No-Bake Ease: The most obvious benefit is that you don’t need an oven. This makes it ideal for hot weather, kitchens with limited equipment, or when you want to involve children in the cooking process safely .
· Make-Ahead Magic: An icebox cake needs time to chill and set, which makes it the perfect make-ahead dessert. You can assemble it the day before a party and simply add the garnishes before serving, reducing last-minute stress .
· Simple Ingredients: The core recipe requires just two main ingredients: cookies and cream. It’s a budget-friendly dessert that relies on pantry staples .
· Endlessly Customizable: From the type of cookies to the flavor of the cream and the array of possible toppings, this dessert can be reinvented in countless ways to suit any taste or occasion .
· Texture Transformation: The process of the cookies softening into a cake-like consistency is a fascinating bit of kitchen magic that results in a uniquely satisfying texture that’s both creamy and tender .
Formation (The Science Behind the Magic)
The transformation from a pile of cookies and cream into a cohesive, sliceable cake is a beautiful example of simple food science at work. The key lies in the moisture migration from the cream to the cookies.
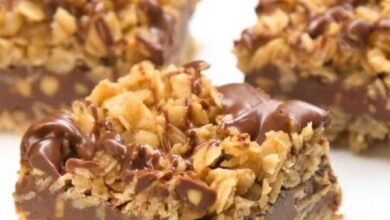
· The Cookies: You want to start with thin, dry, and crispy cookies . Classic choices include Tate’s Chocolate Chip Cookies, Nabisco Famous Chocolate Wafers, vanilla wafers, or even thin Oreos . Their dry, porous structure is perfect for absorbing liquid. Shortbread or thick, soft cookies are not ideal because they won’t soften properly or will become too mushy .
· The Cream: The cream layer provides the necessary moisture. As the assembled cake rests in the refrigerator, the cream’s moisture is drawn into the cookie layers. This process softens the cookies, causing them to meld together with the cream.
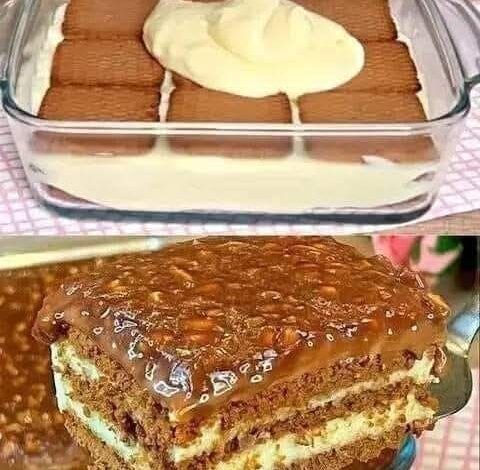
· The Result: After several hours (at least 4-6, but preferably overnight), the cookies have absorbed enough liquid to become tender and cake-like, while the cream has firmed up slightly to hold everything together. The result is a dessert that can be sliced cleanly, revealing beautiful, distinct layers that have fused into one harmonious creation .
Ingredients
This recipe is for a classic and versatile Cookie Icebox Cake that you can easily customize. The quantities are for a standard 8×8-inch square pan or a 9×5-inch loaf pan.
For the Cake:
· 3 cups heavy whipping cream
· 3 tablespoons powdered sugar
· 1 tablespoon vanilla extract
· 2-3 packages (approximately 7-9 oz each) of your favorite crispy cookies. Excellent choices include:
· Chocolate chip cookies (like Tate’s or Chips Ahoy)
· Chocolate wafers (like Nabisco Famous)
· Vanilla wafers
· A mix of different cookies for variety (e.g., Oreo Thins and shortbread)
· Optional, for the Filling: 8 oz cream cheese, softened, for a richer, tangier cream layer .
For Garnish (Choose one or more):
· Store-bought chocolate sauce
· Chocolate shavings or curls
· Crushed cookies of your choice
· Fresh berries (strawberries, raspberries)
· A dusting of cocoa powder
Methods (Instructions)
This is a straightforward no-bake recipe. Follow these steps for a perfect icebox cake.
1. Prepare Your Pan: Line your chosen 8×8-inch baking dish or 9×5-inch loaf pan with plastic wrap or parchment paper, leaving some overhang on the sides. This will make it easy to lift the cake out later . If using a round plate to make a stack cake (like in ), you can skip this step.
2. Whip the Cream:
· In a large mixing bowl (chilling the bowl and beaters first helps), combine the heavy whipping cream, powdered sugar, and vanilla extract .
· Using an electric mixer or stand mixer, beat the mixture on high speed until soft peaks form. This means when you lift the beater, the cream forms a peak that gently flops over. Be careful not to over-whip into butter .
· Optional Rich Filling: If using cream cheese, beat the softened cream cheese in a separate bowl until smooth. Gently fold the whipped cream into the cream cheese until fully combined and fluffy .
3. Start Layering:
· For a Loaf/Square Pan: Spread a thin layer of the whipped cream on the bottom of your prepared pan .
· For a Round Cake: Spread a thin layer of cream on your serving plate to act as “glue” for the first cookies .
· Arrange a single layer of cookies on top of the cream, covering the surface as completely as possible. Break cookies if needed to fill gaps .
4. Build the Layers:
· Spread a generous layer of whipped cream (about ⅔ to 1 cup, depending on your pan size) over the first cookie layer, making sure to spread it to the edges .
· Place another layer of cookies on top of the cream. For stability, you can alternate the direction of the cookies so they aren’t sitting directly on top of the ones below .
· Repeat these layers (cookies, then cream) until you’ve used all but a bit of cream or have reached the top of your pan. You should end with a layer of cream .
· For a round stack cake, you will typically get 5-7 layers of cookies .
5. The “Icebox” Step:
· Once assembled, cover the cake tightly with plastic wrap .
· Refrigerate for at least 4-6 hours, but preferably overnight (8-24 hours) . This crucial step allows the cookies to soften and the flavors to meld. Cakes made with homemade cookies may need a full 24 hours .
6. Serve and Garnish:
· When ready to serve, remove the cake from the refrigerator. If using a lined pan, lift it out using the overhanging plastic wrap or parchment .
· If you made a round stack cake, you can serve it directly from the plate.
· Add your chosen garnishes—a generous drizzle of chocolate sauce, a sprinkle of crushed cookies, chocolate shavings, or fresh berries .
· For the cleanest slices, you can place the cake in the freezer for about 30 minutes before slicing with a sharp, serrated knife . Serve and enjoy!
Nutrition
Please note that the following nutritional information is an estimate and will vary significantly based on the specific brands of cookies and cream you use, as well as any added toppings. This data is based on a classic recipe with chocolate chip cookies and whipped cream .
Note: This is a rich dessert; a serving is typically 1/10th to 1/12th of a cake.
Nutrient Approximate Amount per Serving
Calories ~1181 kcal
Fat ~73g
Saturated Fat ~31g
Carbohydrates ~119g
Sugar ~43g
Protein ~12g
Sodium ~655mg
(Alternative recipes may have different nutritional profiles. For example, a version with cream cheese and keto cookies would have higher fat and lower carbs , while one made with vanilla pudding and milk could have around 300 calories per serving .)
For the Lovers (Why Everyone Adores It)
This cake is a dessert that wins hearts for many reasons.
· Lovers of Nostalgia: For many, this cake is a trip down memory lane, reminiscent of childhood summers and the simple, homemade desserts that Moms and Grandmas used to make .
· Lovers of No-Bake Desserts: Anyone who wants a stunning dessert without the hassle of baking will fall in love with its simplicity and foolproof nature .
· Lovers of Texture: The incredible transformation from crunchy cookie to soft, tender, cake-like layer is a textural experience that is both surprising and deeply satisfying .
· Lovers of Customization: The adventurous baker adores this recipe because it’s a blank canvas. You can experiment with different cookie and cream flavor combinations, fruits, and sauces to create your own signature dessert .
Conclusion
The Cookie Icebox Cake is more than just a recipe; it’s a celebration of simplicity and deliciousness. With its fascinating history, easy methods, and guaranteed crowd-pleasing results, it’s a dessert that truly has it all. Whether you stick to the classic chocolate wafer and whipped cream version or embark on a culinary adventure with new flavor combinations, you’re sure to create a memorable treat. So, gather your ingredients, pick your favorite cookies, and let your refrigerator do the hard work. The result is a cool, creamy, and utterly irresistible cake that everyone will love.