The Ultimate Homemade Beef Jerky Guide Craft Your Own Savory, Protein-Packed Snack
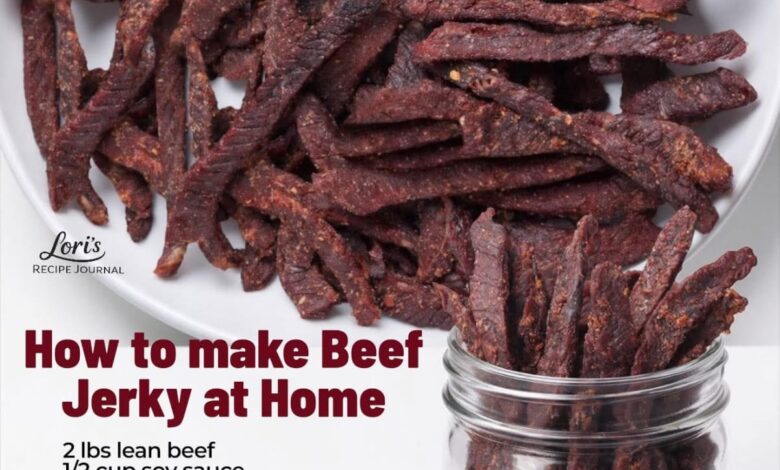
The Ultimate Homemade Beef Jerky Guide
Craft Your Own Savory, Protein-Packed Snack
INTRODUCTION
There’s something incredibly satisfying about making your own beef jerky at home. This ancient preservation method transforms simple lean beef into a flavorful, portable protein powerhouse that’s perfect for hiking trips, road adventures, office snacks, or simply satisfying those midday cravings. Unlike store-bought versions loaded with preservatives and artificial ingredients, homemade beef jerky puts you in complete control—from the quality of meat to the intensity of seasonings.
Imagine biting into a strip of perfectly cured beef that’s simultaneously chewy and tender, bursting with smoky, savory notes with just the right amount of heat. That’s the magic of homemade jerky. This comprehensive guide will walk you through every step of the process, from selecting the perfect cut of meat to achieving that ideal texture that keeps you reaching for “just one more piece.”
Whether you’re a seasoned jerky maker or a curious beginner, this recipe delivers consistently delicious results that will have your friends and family begging for your secret.
HISTORY OF BEEF JERKY
The word “jerky” comes from the Quechua word “ch’arki,” which means “dried meat.” This preservation technique dates back thousands of years to ancient South American civilizations, particularly the Inca Empire, who would dry meat in the high-altitude sun to preserve it for long journeys and harsh winters.
Native Americans adopted and refined these techniques, creating their own versions using bison and game meats. They would thinly slice the meat and dry it over slow fires or in the sun, sometimes pounding it with berries and fat to create pemmican—a concentrated, high-energy food that could sustain them through lean times.
European settlers learned these preservation methods from indigenous peoples, and jerky became a staple for pioneers, cowboys, and explorers heading west. The ability to preserve meat without refrigeration made it invaluable for long cattle drives and wagon trains crossing the American frontier.
Today, beef jerky has evolved from a survival food into a beloved snack enjoyed worldwide, with countless flavor variations reflecting regional tastes and culinary creativity.
INGREDIENTS
For the Beef:
· 2 pounds lean beef (see “Best Meat Cuts” section below for recommendations)
For the Marinade:
· ½ cup soy sauce (provides saltiness and umami depth)
· ¼ cup Worcestershire sauce (adds tangy, complex flavor notes)
· 1 tablespoon brown sugar (balances saltiness and aids in browning)
· 1 teaspoon onion powder (foundational savory flavor)
· 1 teaspoon garlic powder (aromatic depth without burning)
· 1 teaspoon black pepper (freshly ground for best results)
· 1 teaspoon red pepper flakes (adjust to taste for heat preference)
· 1 teaspoon smoked paprika (imparts smoky character and rich color)
· ½ teaspoon curing salt (optional but recommended for longer shelf life and color retention)
BEST MEAT CUTS: THE FORMATION OF PERFECT JERKY
The foundation of exceptional beef jerky lies in selecting the right cut of meat. Lean cuts with minimal fat are essential because fat can become rancid during the drying process, spoiling your jerky and reducing its shelf life. Fat also prevents proper drying and can create an unpleasant texture.
Recommended Cuts:
Top Round
This cut comes from the inside of the hind leg and is exceptionally lean with a fine grain. It’s widely available, affordable, and produces consistently excellent jerky with a nice chew.
Bottom Round
Slightly tougher than top round but still excellent for jerky. It has more connective tissue that breaks down during drying, resulting in a satisfying texture.
Eye of Round
Perhaps the most popular choice for jerky making. This cylindrical muscle is incredibly lean and uniform, making it easy to slice consistently. It produces tender jerky with a classic texture.
Flank Steak
Known for its pronounced grain and beefy flavor, flank steak makes outstanding jerky. It’s slightly more expensive but worth every penny for the rich taste.
Sirloin Tip
Another excellent lean option that’s budget-friendly and readily available. It has good flavor and slices well for jerky.
Preparation Tips:
· Trim thoroughly: Remove any visible fat and silverskin before slicing
· Partial freezing: Place meat in the freezer for 30-45 minutes before slicing—this firms it up, making uniform slices much easier to achieve
· Consistency is key: Aim for uniform thickness to ensure even drying
INSTRUCTIONS: STEP-BY-STEP METHOD
Step 1: Prepare the Beef
1. Trim the meat: Remove all visible fat and connective tissue from the beef surface. This is crucial for preventing spoilage and achieving proper texture.
2. Partial freeze: Place the trimmed beef in the freezer for 30-45 minutes. The meat should be firm but not completely frozen solid.
3. Slice properly: Using a sharp knife, slice the beef into strips approximately ⅛ to ¼ inch thick.
· Cut with the grain for traditional, chewy jerky that pulls apart
· Cut against the grain for more tender, easier-to-bite jerky
4. Uniformity matters: Try to keep all strips roughly the same thickness so they dry at the same rate.
Step 2: Create the Marinade
1. In a medium bowl, combine:
· Soy sauce
· Worcestershire sauce
· Brown sugar
· Onion powder
· Garlic powder
· Black pepper
· Red pepper flakes
· Smoked paprika
· Curing salt (if using)
2. Whisk thoroughly until the brown sugar dissolves completely.
3. Taste the marinade and adjust seasonings according to your preference—remember that flavors will concentrate as the meat dries.
Step 3: Marinate the Beef
1. Place the beef strips in a large resealable plastic bag or glass container with a lid.
2. Pour the marinade over the beef, ensuring all strips are completely coated.
3. Seal the bag, removing as much air as possible, or cover the container.
4. Gently massage the bag to distribute marinade evenly.
5. Refrigerate for 8-24 hours. The longer it marinates, the more intense the flavor will be.
· 8 hours: Mild flavor penetration
· 12-16 hours: Well-balanced flavor
· 24 hours: Maximum flavor intensity
6. Turn the bag occasionally during marinating to ensure even distribution.
Step 4: Prepare for Drying
1. Remove beef from refrigerator and let it sit at room temperature for 15-20 minutes.
2. Drain off excess marinade and pat the strips dry with paper towels. This step is important for efficient drying and prevents a sticky residue.
3. Arrange strips in a single layer without touching each other.
Step 5: Choose Your Drying Method
OVEN METHOD
1. Preheat your oven to its lowest setting, ideally 170°F (75°C) . If your oven doesn’t go this low, prop the door open slightly with a wooden spoon handle to allow heat to escape.
2. Place a wire cooling rack over a baking sheet lined with aluminum foil (for easy cleanup).
3. Arrange beef strips on the wire rack in a single layer, ensuring they don’t touch or overlap.
4. Place in the oven and bake for 3-5 hours, depending on thickness and desired dryness.
5. Rotate the baking sheet and flip the strips once halfway through for even drying.
6. Begin checking for doneness after 3 hours.
DEHYDRATOR METHOD
1. Set your food dehydrator to 160°F (70°C) , the recommended temperature for meat.
2. Arrange beef strips on dehydrator trays in a single layer, leaving space between pieces for air circulation.
3. Dry for 4-6 hours, rotating trays if your dehydrator has uneven heat distribution.
4. Check periodically and remove pieces as they reach desired doneness—thinner strips may finish earlier.
Step 6: Test for Doneness
Properly dried jerky should exhibit these characteristics:
· Bend test: When bent, the jerky should crack slightly on the surface but not break in half. It should be flexible enough to bend without snapping.
· Texture: Firm and dry to the touch with no visible moisture when squeezed
· Appearance: Darker in color with a slightly leathery look
· Feel: Slightly chewy but not hard or brittle
If there’s any doubt, err on the side of slightly under-dried—you can always continue drying, but over-dried jerky becomes tough and unpleasant.
NUTRITION INFORMATION
Per 1-ounce serving (approximately 28g, about 3-4 medium strips)
Nutrient Amount
Calories 80-100
Protein 15-18g
Fat 1-3g
Carbohydrates 2-4g
Fiber 0g
Sugar 1-2g
Sodium 400-600mg
Iron 10% DV
Zinc 15% DV
Vitamin B12 20% DV
Note: Values are approximate and will vary based on specific ingredients and drying time.
HEALTH BENEFITS
High-Quality Protein
Beef jerky is an exceptional source of complete protein, containing all essential amino acids your body needs for muscle repair, immune function, and tissue maintenance. A single ounce provides as much protein as an egg, making it an efficient protein delivery system.
Low Carbohydrate Content
With minimal carbs, homemade beef jerky fits perfectly into low-carb, keto, and paleo dietary patterns. You control the sugar content by adjusting the brown sugar in the marinade.
Rich in Essential Minerals
· Iron: Crucial for oxygen transport in the blood and preventing fatigue
· Zinc: Supports immune function, wound healing, and DNA synthesis
· Phosphorus: Essential for bone health and energy production
· Selenium: Important antioxidant that protects cells from damage
B-Vitamin Complex
Beef is naturally rich in B vitamins, particularly B12 (cobalamin), which is only found naturally in animal products. These vitamins are vital for:
· Energy metabolism
· Brain function and neurological health
· Red blood cell formation
· DNA synthesis
Portable and Shelf-Stable
Unlike fresh meat, properly dried jerky requires no refrigeration for short-term storage, making it an ideal healthy snack for travel, hiking, camping, and emergencies.
No Artificial Additives
By making jerky at home, you avoid the preservatives, MSG, excessive sugar, and artificial flavorings commonly found in commercial products.
STORAGE METHODS
Proper storage is essential for maintaining quality and preventing spoilage.
Short-Term Storage (Room Temperature)
· Store in an airtight container or resealable bag
· Keep in a cool, dark, dry place
· Shelf life: 1-2 weeks
Refrigerator Storage
· Place in airtight container or vacuum-sealed bag
· Cold temperatures extend freshness significantly
· Shelf life: 3-4 weeks
Freezer Storage
· Vacuum seal or use freezer bags with all air removed
· Label with date and cut type
· Shelf life: 3-6 months (quality remains excellent)
Storage Tips:
· Allow jerky to cool completely before packaging to prevent condensation
· If you see any moisture inside the container, the jerky wasn’t dried enough
· Discard immediately if you notice any mold, off-odors, or sliminess
· For long-term storage, consider using oxygen absorbers in vacuum-sealed bags
FOR JERKY LOVERS: VARIATIONS AND TIPS
Flavor Variations to Explore
Teriyaki Twist
Add 2 tablespoons mirin and 1 tablespoon sesame oil to the base marinade. Garnish with sesame seeds after drying.
Spicy Chipotle
Replace red pepper flakes with 2 chopped chipotle peppers in adobo sauce and add 1 teaspoon cumin.
Honey Bourbon
Add 2 tablespoons bourbon and 1 tablespoon honey to the marinade. Reduce brown sugar to 1 teaspoon.
Coffee Crusted
Add 1 tablespoon finely ground coffee to the marinade for deep, earthy notes that complement the beef beautifully.
Sweet & Spicy Thai
Incorporate 1 tablespoon fish sauce, 1 tablespoon lime juice, and 1 teaspoon sriracha.
Pro Tips for Perfect Jerky
1. Uniform thickness is everything: Inconsistent slices mean some pieces will be over-dried while others remain under-dried.
2. Don’t overcrowd: Whether using an oven or dehydrator, air needs to circulate around each piece.
3. Test early and often: Different thicknesses and even slight variations in meat density can affect drying times.
4. Pat dry thoroughly: Removing excess marinade before drying prevents a sticky, tacky surface.
5. Let it rest: After drying, let jerky cool completely before testing texture—it will firm up as it cools.
6. Cut against the grain for tenderness: If you want easier-to-chew jerky, this simple change makes a huge difference.
7. Use curing salt for safety: If you plan to store jerky at room temperature for extended periods, curing salt (pink salt) inhibits bacterial growth.
CONCLUSION
Making homemade beef jerky is more than just a cooking project—it’s a connection to ancient preservation traditions combined with modern flavor creativity. This simple process transforms economical cuts of beef into a premium snack that surpasses anything you’ll find at the store.
The satisfaction of crafting your own jerky extends beyond the delicious results. You gain complete control over ingredients, avoiding the preservatives and additives common in commercial products. You can customize flavors to match your preferences, from mild and smoky to explosively spicy. And you’ll save money while creating something genuinely special.
Whether you’re fueling an outdoor adventure, packing lunches for the week, or simply treating yourself to a protein-rich snack, this homemade beef jerky delivers on every level. The process requires patience—the long marination and slow drying can’t be rushed—but that patience rewards you with jerky that’s infinitely better than anything mass-produced.
So gather your ingredients, choose your favorite cut of beef, and embark on this flavorful journey. Your taste buds—and your wallet—will thank you.
Have you tried this recipe? Share your jerky-making adventures and flavor variations with fellow enthusiasts. Happy drying!
#beefjerky #homemadejerky #homemadesnacks #proteinsnack #jerkyrecipe #dehydratorrecipes #healthysnacks #DIYsnacks #beefrecipes #snackideas