Here is a big, comprehensive guide to making Philly Cheesesteak Puff Pastry, covering everything from its history to a step-by-step guide and even some nutritional insights.
The Ultimate Guide to Philly Cheesesteak Puff Pastry
Introduction
Imagine the iconic, savory flavors of a Philadelphia cheesesteak—tender beef, caramelized onions, and melted cheese—all enveloped in a blanket of golden, flaky, buttery puff pastry. This is not just a sandwich; it’s an experience. Philly Cheesesteak Puff Pastry takes the beloved classic and elevates it to a new level of elegance and texture, transforming a hearty street food into a sophisticated appetizer, a fun main course, or the star of any party spread. The contrast between the crisp, airy pastry and the rich, savory filling creates a symphony in every bite, making it an instant favorite for both casual dinners and special occasions.
A Brief History of the Philly Cheesesteak
To truly appreciate this dish, one must understand its roots. The original Philly cheesesteak was born in the early 20th century in South Philadelphia. Legend has it that hot dog vendor Pat Olivieri threw some sliced beef on his grill for a sandwich, and the aroma was so enticing that a cab driver stopped to have one, thus sparking the beginning of a culinary legend . Pat’s King of Steaks, which still operates today, became the epicenter of this new sandwich, which was traditionally served on a long, crusty hoagie roll with grilled onions and “Cheez Whiz,” though provolone and American cheese are also popular.
Our recipe today is a modern twist on this classic, swapping the traditional roll for puff pastry. This variation likely emerged from the broader culinary trend of the late 20th and early 21st centuries, where chefs and home cooks began experimenting with familiar flavors in new formats. The goal was to create something that felt both familiar and excitingly new, resulting in the “upscale” and “gourmet” pockets and rolls we enjoy today .
Why This Recipe Works: The Benefits
· Flaky Texture: Puff pastry provides a delicate, buttery, and incredibly flaky crust that is a world away from a standard bread roll. It offers a delightful crunch that complements the tender filling.
· Customizable: This recipe is a fantastic base for your own creativity. You can easily swap cheeses, add different vegetables like bell peppers or mushrooms, or even introduce a kick of heat with some jalapeños or a drizzle of sriracha.
· Make-Ahead Friendly: You can prepare the filling a day in advance and store it in the refrigerator. When you’re ready to serve, simply assemble and bake for a fresh, hot treat .
· Versatile Serving: These pastry parcels are perfect for any occasion. Serve them as a fun weeknight dinner with a side salad, cut them into smaller pieces for a crowd-pleasing appetizer, or pack them for an impressive picnic lunch .
· Freezer-Friendly: Baked rolls can be cooled completely, wrapped individually, and frozen. Reheat them in the oven for a quick and satisfying meal later on .
The Formation: Ingredients and Tools
Before we begin, let’s gather our “formation” of ingredients and tools to ensure a smooth cooking process.
Ingredients
This recipe combines a handful of simple ingredients to create something truly special. Below is a table outlining the key components, along with potential substitutions to suit your taste.
Ingredient Amount Notes & Substitutions
Puff Pastry 1 sheet (half of a 17.3 oz package) Ensure it’s thawed according to package directions . You can use homemade or a different brand.
Beef 6-8 oz Classic: Frozen sandwich steaks or thinly sliced ribeye . Alternatives: Sirloin, New York strip, or even leftover roast beef, thinly sliced .
Onion 1 medium Yellow or white onion, sliced thinly.
Cheese 4 slices Classic: American cheese or provolone . Alternative: Provolone, shredded cheddar, or even Cheez Whiz for a truly authentic touch .
Egg 1 large Beaten with 1 tablespoon of milk or water to create an egg wash for a golden, shiny crust .
Vegetable Oil 1 tablespoon For cooking the onions and steak. Canola or avocado oil are great substitutes .
All-purpose Flour 2 tablespoons For dusting your work surface to prevent the pastry from sticking .
(Optional) Bell Pepper ½ Green bell pepper, thinly sliced, for a more traditional “Philly” style with peppers .
(Optional) Seasonings To taste Salt, pepper, and garlic powder to season the beef .
Tools
· Baking sheet
· Parchment paper
· Skillet (10-inch recommended)
· Rolling pin
· Sharp knife or pizza cutter
· Pastry brush
· Wire cooling rack
The Methods: A Step-by-Step Guide
Follow these methods closely for perfect Philly Cheesesteak Puff Pastry every time.
Step 1: Prepare the Oven and Pastry
Preheat your oven to 400°F (200°C) . Line a baking sheet with parchment paper. On a lightly floured surface, unfold the thawed puff pastry sheet. Gently roll it into a 10-inch square to ensure even thickness. Using a sharp knife or pizza cutter, cut the square into 4 equal (5-inch) squares .
Step 2: Cook the Filling
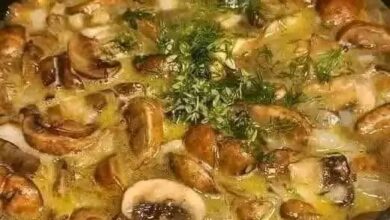
Heat the vegetable oil in a skillet over medium heat. Add the sliced onion (and bell pepper, if using) and cook until softened and just starting to caramelize, about 5-7 minutes. Remove the vegetables from the skillet and set aside .
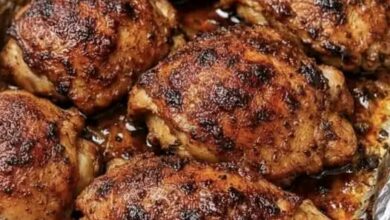
Increase the heat to medium-high and add the thinly sliced beef. Cook, stirring occasionally, until the beef is browned and cooked through, about 3-5 minutes . If you’re using a thicker cut of steak like ribeye, you can cook it whole for about 5 minutes per side, then let it rest before slicing it thinly against the grain .
Step 3: Assemble the Pastries
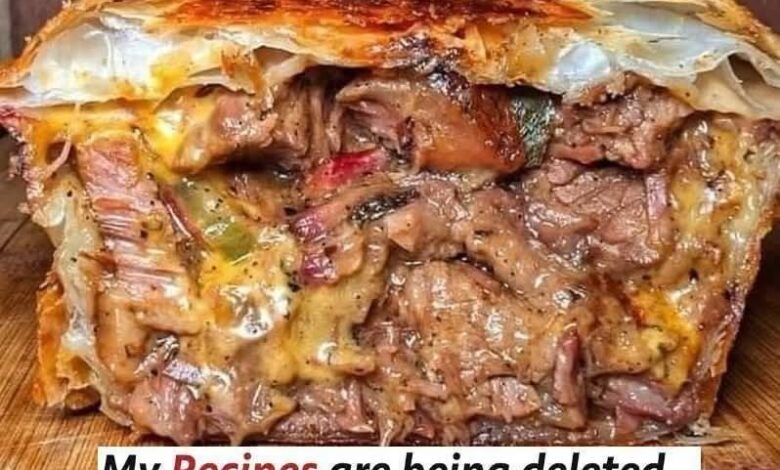
Spoon one-quarter of the cooked onions and one-quarter of the beef onto the center or bottom third of each pastry square, leaving a small border for sealing. Top the filling with a slice of your chosen cheese .
To form a roll, fold two opposite sides of the pastry square over the filling. Then, starting from the filled end, roll it up like a jelly roll, sealing the edge by pressing gently . For a pocket-style pastry, place the filling on one half of the square, top with cheese, fold the other half over, and crimp the edges with a fork to seal .
Step 4: Egg Wash and Bake
Place the assembled pastries seam-side down on the prepared baking sheet. In a small bowl, whisk the egg with 1 tablespoon of milk or water. Brush the tops and sides of each pastry generously with the egg wash. This is the secret to that beautiful golden-brown color. Cut 2-3 small slits on top of each pastry to allow steam to escape during baking .
Bake for 20-25 minutes, or until the pastries are puffed up and a deep golden brown .
Step 5: Cool and Serve
Remove the baking sheet from the oven and let the pastries cool on the sheet for at least 10 minutes . This crucial step allows the filling to set and prevents you from burning your mouth on the molten cheese. After resting, transfer them to a wire rack or serve them warm, cut in half diagonally to show off that beautiful, flaky interior.
Nutrition Information
As with any indulgent dish, it’s helpful to be aware of its nutritional profile. The values below are estimates and will vary based on the specific ingredients and cuts of meat you use. This information is based on a serving size of one pastry.
Nutrient Amount per Serving % Daily Value (approx.)
Calories 583 – 634 29%
Total Fat 42 – 45g 54-64%
Saturated Fat 14 – 16g 70-80%
Cholesterol 64 – 106mg 21-35%
Sodium 373 – 771mg 16-34%
Total Carbohydrate 30 – 39g 10-13%
Dietary Fiber 2g 7%
Protein 18 – 21g 36-42%
Data compiled from Allrecipes and Zona Cooks . Daily Values based on a 2,000-calorie diet.
For the Lovers: Frequently Asked Questions
Here are some common questions from those who love this dish, answered to help you achieve perfection.
Q: Can I use a different type of cheese?
A: Absolutely! While American and provolone are the most popular choices , you can experiment with shredded cheddar , mozzarella for extra stretch, or even a spicy pepper jack for a kick. For an authentic touch, try drizzling some Cheez Whiz over the meat before sealing .
Q: How do I prevent the pastries from becoming soggy?
A: The key is to ensure your filling isn’t too wet. After cooking the beef and onions, let them cool slightly. If there’s a lot of liquid in the pan, you can drain it off or use a slotted spoon when transferring the filling to the pastry . Also, cutting steam vents in the top of the pastries before baking allows moisture to escape, keeping the pastry crisp .
Q: Can I add other vegetables?
A: Yes, definitely. Sautéed green bell peppers are a classic addition . Sliced mushrooms are another fantastic option that pairs beautifully with the beef . Just be sure to cook them with the onions to release their moisture before adding them to the pastry.
Q: My puff pastry is cracking. What am I doing wrong?
A: This usually happens when the pastry is too cold. If it cracks while you’re unfolding or rolling it, let it sit at room temperature for another 5-10 minutes to warm up slightly. It should be cool but pliable . Conversely, if it becomes too sticky, pop it back in the fridge for a few minutes to firm up .
Q: What should I serve with these?
A: These pastries are quite rich and satisfying. They pair wonderfully with a simple green salad dressed with a light vinaigrette to cut through the richness. For dipping, consider classic ketchup, a creamy horseradish sauce, some extra warm cheese sauce, or even a spicy aioli .
Conclusion
Philly Cheesesteak Puff Pastry is more than just a recipe; it’s a celebration of flavor and texture. It honors the humble origins of the Philadelphia cheesesteak while presenting it in a form that feels both new and exciting. Whether you’re a seasoned cook or a beginner in the kitchen, this recipe is forgiving, adaptable, and guaranteed to impress.
The joy of this dish lies not only in its delicious taste but also in the process of creating it—from the sizzle of the beef in the pan to the magical puff of the pastry in the oven. It’s a dish made for sharing, for gathering around a table, and for creating new memories with a classic flavor. So, preheat your oven, roll out that pastry, and get ready to fall in love with a new favorite. Enjoy