Of course! Here is a comprehensive guide to making Easy Amish White Bread, structured with all the elements you requested.
A Complete Guide to Easy Amish White Bread
Introduction
There’s something magical about the aroma of freshly baked bread wafting through a home. It’s a scent of comfort, tradition, and love. This Easy Amish White Bread recipe captures that magic perfectly. Known for its slightly sweet flavor and velvety, soft texture, this homemade bread is often compared to classic milk bread. It’s incredibly versatile, making it the ideal loaf for your morning toast, the foundation of a hearty sandwich, or a simple, satisfying side to a bowl of soup. Whether you’re a seasoned baker or trying your hand at yeast bread for the first time, this foolproof recipe will guide you to create two beautiful, golden loaves. We’ve included instructions for making it by hand or in a bread machine, so you can choose the method that works best for you.
History
While the recipe is a modern staple in many homes, its soul is rooted in the traditions of the Amish communities in North America . For the Amish, bread is more than just food; it’s a cornerstone of daily life and a symbol of community and self-sufficiency . Using simple, pantry-staple ingredients—flour, water, yeast, sugar, and fat—they would bake several loaves a week to feed their families, filling their homes with the comforting aroma of fresh bread . These loaves were (and still are) shared at community gatherings, Sunday meals, and family tables. This recipe is a tribute to that spirit of simplicity, resourcefulness, and the heartfelt act of baking for those you love. The slightly sweet flavor profile is a signature of many Amish white bread recipes, distinguishing it from other plainer white loaves and adding to its universal appeal .
Benefits
Why should you make this Amish White Bread? The reasons are plentiful:
· Incredible Taste and Texture: The combination of milk and a touch of sugar yields a loaf that is significantly softer, richer, and more flavorful than anything you can buy at the store .
· Simple, Wholesome Ingredients: You probably already have everything you need in your pantry. This recipe contains no preservatives, artificial additives, or high-fructose corn syrup, just real, recognizable food .
· Cost-Effective: Baking your own bread is far more economical than buying specialty bakery loaves .
· Versatility: It’s perfect for sandwiches, toast, French toast, bread pudding, or simply enjoyed warm with a pat of butter .
· Stress-Relieving and Rewarding: The process of kneading dough and watching it rise is therapeutic, and the feeling of pulling two golden loaves from your own oven is deeply satisfying .
Formation (Ingredient Roles)
Understanding the “why” behind each ingredient is the key to baking success. Here’s how they work together to form the perfect loaf:
· Warm Water (110°F-115°F): Hydrates the flour, allowing gluten to develop, and activates the yeast. The correct temperature is crucial—too hot and it will kill the yeast; too cool and the yeast won’t fully activate .
· Warm Milk: This is the secret to the bread’s velvety texture. The fats and proteins in milk tenderize the dough, enrich the flavor, and contribute to a beautiful, golden-brown crust .
· Sugar: Provides food for the yeast, helping it grow and produce the carbon dioxide that makes the bread rise. It also adds the characteristic subtle sweetness and helps the crust brown .
· Active Dry Yeast: The living organism that ferments and releases gases, causing the dough to rise. “Proofing” the yeast in warm water with a pinch of sugar ensures it’s active and alive before you add the other ingredients .
· Salt: Essential for flavor, it also strengthens the gluten structure and controls the yeast activity so the bread doesn’t rise too quickly .
· Unsalted Butter or Vegetable Oil: Adds moisture, richness, and flavor. Fat coats the gluten strands, resulting in a softer, more tender crumb. It also helps the bread stay fresh longer .
· All-Purpose or Bread Flour: Provides the structural protein (gluten). Bread flour has a higher protein content, which can lead to a chewier loaf, while all-purpose flour will produce a very tender bread. Both work wonderfully .
Methods (Instructions: Stand Mixer & By Hand)
Ingredients
· 1 cup warm water (120°F-130°F)
· 1 cup warm milk (120°F-130°F)
· ½ cup white sugar (some recipes use ⅔ cup for a sweeter loaf)
· 2 ¼ teaspoons (one ¼-ounce packet) active dry yeast
· 1 ½ teaspoons salt
· ¼ cup unsalted butter, melted (or vegetable oil)
· 6 cups all-purpose or bread flour, spooned & leveled (plus more for kneading)
Instructions
1. Proof the Yeast: In the large bowl of a stand mixer or a large regular bowl, combine the warm water, warm milk, and sugar. Stir to dissolve the sugar, then sprinkle the yeast over the top. Let it sit for 5-10 minutes until it becomes foamy and fragrant. This confirms your yeast is active .
2. Form the Dough: Add the melted butter (or oil), salt, and 3 cups of the flour to the yeast mixture. If using a stand mixer with the dough hook attachment, mix on low until combined. Gradually add the remaining flour, one cup at a time, until the dough begins to pull away from the sides of the bowl .
3. Knead the Dough:
· Stand Mixer Method: Knead with the dough hook on medium-low speed for about 5-7 minutes, until the dough is smooth and elastic.
· By Hand Method: Turn the dough out onto a lightly floured surface. Knead by pushing the dough down and away from you with the heel of your hand, then folding it back over itself. Give it a quarter turn and repeat. Continue for 8-10 minutes, adding only as much flour as needed to prevent sticking, until the dough is smooth and springy .
4. First Rise: Lightly grease a large, clean bowl with oil. Place the dough in the bowl, turning it once to coat the entire surface with oil. Cover the bowl tightly with plastic wrap or a clean, damp kitchen towel. Let it rise in a warm, draft-free place for 1 to 1 ½ hours, or until it has doubled in size .
5. Shape the Loaves: Punch the dough down firmly in the center to release the gas. Turn it out onto a lightly floured surface. Divide the dough in half with a sharp knife or bench scraper. Shape each half into a loaf by patting it into a rectangle and then rolling it up tightly from the short end, pinching the seam to seal. Tuck the ends under .
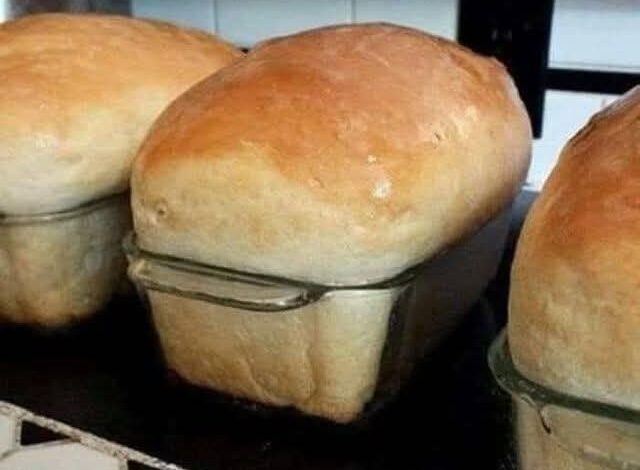
6. Second Rise: Place the loaves seam-side down into two greased 9×5-inch loaf pans. Cover them loosely with the same towel or plastic wrap. Let them rise for about 30 minutes to 1 hour, or until the dough has risen about 1 inch above the rim of the pans .
7. Bake: About 20 minutes into the second rise, preheat your oven to 350°F (175°C). Bake the loaves for 25-30 minutes, or until they are golden brown and sound hollow when tapped on the bottom. If the tops are browning too quickly, tent them loosely with aluminum foil .
8. Cool: Remove the loaves from the pans immediately and let them cool completely on a wire rack before slicing. This step is crucial, as slicing into a hot loaf will make it gummy and dense .
Bread Machine Method
This recipe can easily be adapted for a bread machine .
1. Add Ingredients: Place the ingredients in your bread machine pan in the order recommended by the manufacturer. This is typically liquids first, then dry ingredients, with the yeast last, placed in a small well on top of the flour.
· A common order is: warm water, warm milk, melted butter, salt, sugar, flour, and finally the yeast .
2. Select Cycle: Select the “Basic” or “White Bread” cycle and choose your desired crust setting (light or medium is recommended). Press Start .
3. Monitor (Optional Trick): For an even fluffier loaf, some bakers like to turn the machine off after the first kneading and rise cycle, then reset and start it again. This gives the dough two full kneading and rising cycles before the final bake .
4. Cool: Once the cycle is complete, remove the bread from the pan immediately and let it cool completely on a wire rack.
Nutrition
The nutritional content can vary slightly based on exact ingredients and serving size. The following is an estimate per slice (based on 12 slices per loaf) :
Nutrient Amount
Calories ~300-332 kcal
Total Fat ~5-8g
Carbohydrates ~54-58g
Protein ~7-8g
Sugar ~8-10g
Sodium ~220-290mg
Note: This bread is a source of energy (carbohydrates) and some protein. Using all-purpose flour means it contains less fiber than whole-grain alternatives.
Lovers (Who Will Enjoy This Bread)
This bread is for everyone, but it is especially beloved by:
· Beginners: Its forgiving nature and straightforward steps make it the perfect first yeast bread.
· Families: It’s a kid-friendly bread that makes the best after-school snacks and school lunch sandwiches.
· Traditionalists: Those who appreciate the simple, honest flavor of homemade bread made with basic ingredients.
· Nostalgists: Anyone who wants to recreate the taste and aroma of their grandmother’s kitchen.
· Foodies: It serves as a fantastic base for gourmet sandwiches, artisan toast, or homemade bread pudding.
Conclusion
Baking this Easy Amish White Bread is more than just following a recipe; it’s an experience. It’s about connecting with a simple, time-honored tradition and creating something truly special with your own hands. From the moment you proof the yeast to the second you pull the golden loaves from the oven, your kitchen will be filled with warmth and an irresistible aroma. The result is two loaves of impossibly soft, slightly sweet bread that will elevate any meal. So, roll up your sleeves, gather your ingredients, and discover the profound joy of baking bread from scratch. We promise, once you’ve tasted a slice of this homemade Amish White Bread, still warm from the oven and slathered with butter, you’ll never want to go back to store-bought.