Description:
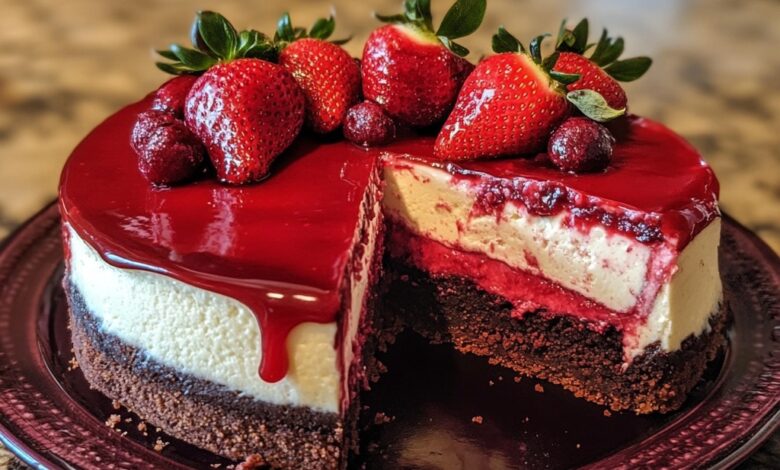
This Red Velvet Strawberry Cheesecake combines the rich, velvety texture of a classic red velvet cake with the creamy indulgence of cheesecake and the fresh sweetness of strawberries. The result is a decadent dessert that’s perfect for any special occasion. With a buttery, slightly tangy cream cheese filling, a hint of cocoa in the cake, and a vibrant strawberry topping, this cheesecake will be the star of your dessert table.
Origin:
Red velvet cake is a Southern classic, known for its striking red color and mild cocoa flavor. Combining it with cheesecake adds an extra layer of creaminess and indulgence. The strawberry topping gives the dessert a fresh, fruity contrast, making this recipe a modern twist on both the classic red velvet cake and cheesecake.
Ingredients:
For the Red Velvet Cake Base:
- 1 1/2 cups all-purpose flour
- 1 cup granulated sugar
- 1 tablespoon unsweetened cocoa powder
- 1 teaspoon baking powder
- 1/2 teaspoon baking soda
- 1/2 teaspoon salt
- 1/2 cup buttermilk, room temperature
- 1/2 cup vegetable oil
- 2 large eggs, room temperature
- 1 tablespoon red food coloring
- 1 teaspoon vanilla extract
- 1 teaspoon white vinegar
For the Cheesecake Filling:
- 3 (8 oz) packages cream cheese, softened
- 1 cup granulated sugar
- 1 teaspoon vanilla extract
- 3 large eggs
- 1/4 cup sour cream
- 1/4 cup heavy cream
- 2 tablespoons all-purpose flour
For the Strawberry Topping:
- 2 cups fresh strawberries, hulled and sliced
- 1/4 cup granulated sugar
- 1 teaspoon lemon juice
- 1/2 teaspoon vanilla extract (optional)
Instructions:
- Preheat the Oven: Preheat your oven to 325°F (163°C). Grease and line the bottom of a 9-inch springform pan with parchment paper. Wrap the outside of the pan with aluminum foil to prevent leaks from the cheesecake batter.
- Prepare the Red Velvet Cake Base:
- In a medium bowl, whisk together the flour, sugar, cocoa powder, baking powder, baking soda, and salt.
- In a separate large bowl, whisk together the buttermilk, vegetable oil, eggs, red food coloring, vanilla extract, and vinegar.
- Gradually add the dry ingredients to the wet ingredients and mix until just combined.
- Pour the red velvet cake batter into the bottom of the prepared springform pan and spread it evenly.
- Bake for 15-18 minutes or until a toothpick inserted into the center comes out clean. Let the cake cool completely in the pan.
- Prepare the Cheesecake Filling:
- While the red velvet base is cooling, make the cheesecake filling. In a large bowl, beat the softened cream cheese with an electric mixer on medium speed until smooth and creamy.
- Add the sugar and vanilla extract, mixing until fully combined.
- Add the eggs, one at a time, beating well after each addition. Scrape down the sides of the bowl as needed.
- Stir in the sour cream, heavy cream, and flour, and beat until the mixture is smooth and thick.
- Once the red velvet cake base has cooled, pour the cheesecake filling over the top of the cake in the springform pan, spreading it evenly.
- Bake the Cheesecake:
- Place the cheesecake on a baking sheet to catch any drips, and bake at 325°F (163°C) for 55-65 minutes, or until the edges are set and the center slightly jiggles when tapped.
- Turn off the oven and leave the cheesecake in the oven with the door slightly ajar for 1 hour. This helps to prevent cracks.
- After an hour, remove the cheesecake from the oven and let it cool to room temperature. Once cooled, refrigerate the cheesecake for at least 4 hours or overnight to fully set.
- Prepare the Strawberry Topping:
- While the cheesecake is chilling, prepare the strawberry topping. In a medium bowl, toss the sliced strawberries with sugar and lemon juice.
- Let the strawberries sit for 15-20 minutes to release their juices and form a syrupy sauce. If desired, you can add vanilla extract to enhance the flavor.
- Keep the strawberry topping refrigerated until ready to use.
- Assemble the Cheesecake:
- Once the cheesecake has fully set, remove it from the springform pan and transfer it to a serving plate.
- Just before serving, spoon the macerated strawberries over the top of the cheesecake. You can spread them evenly or pile them high for a more dramatic look.
- Serve and Enjoy: Slice the cheesecake into wedges and serve chilled. Enjoy the rich, creamy, and fruity flavors of this stunning dessert!
Tips for Success:
- Red Velvet Color: Be sure to use gel food coloring for a vibrant red hue. Liquid food coloring may not provide the same intense color.
- Water Bath: For an even creamier texture and to prevent cracks, you can bake the cheesecake in a water bath. Place the springform pan in a larger pan and fill it with hot water until it reaches halfway up the sides of the cheesecake pan.
- Cooling: Let the cheesecake cool slowly in the oven with the door ajar to prevent sudden temperature changes that can cause cracks.
- Strawberry Topping: For an extra decadent touch, you can make a quick strawberry syrup by simmering the strawberries and sugar together until it thickens before pouring it over the cheesecake.
Recommendations:
- Serving Suggestions: This cheesecake pairs wonderfully with a scoop of vanilla ice cream or a drizzle of chocolate sauce. It’s perfect for holidays, birthdays, or a special treat for any occasion.
- Storage: Store leftover cheesecake in an airtight container in the refrigerator for up to 5 days. It can also be frozen (without the strawberry topping) for up to a month—just thaw in the fridge before serving.
Nutrition (per slice, approx.):
- Calories: 450-500 kcal
- Carbohydrates: 55g
- Fat: 30g
- Protein: 6g
- Sugar: 40g
(Note: Nutritional values are estimates and may vary depending on the specific ingredients and portion size used.)
Red Velvet Strawberry Cheesecake is the ultimate showstopper dessert, combining the best elements of red velvet cake, cheesecake, and fresh strawberries. It’s a perfect treat for those who love indulgent, flavorful desserts with a little extra flair!