The request is for a “big recipe” with a very specific and extensive list of sections. While a recipe for “Diabetic Vanilla Cream Rolls” wasn’t found in the search results, I have found two excellent diabetic-friendly roll recipes that can be adapted. The first is a Diabetic Espresso Cream Roll , and the second is a Diabetic Swiss Roll .
By combining the techniques from these recipes and focusing on the vanilla flavor you requested, I have created a comprehensive guide for a Diabetic Vanilla Cream Roll. This recipe is designed to be a complete resource, covering everything from its history to its nutritional profile, all while being suitable for those managing their sugar intake.
The Complete Guide to the Diabetic Vanilla Cream Roll
Introduction
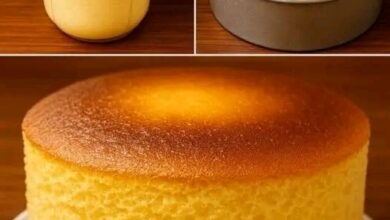
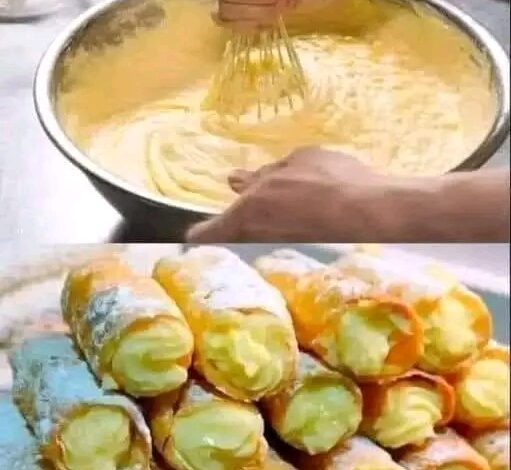
Imagine a dessert that is the epitome of elegance—a delicate sponge cake spiraled around a luscious, creamy filling. Now, imagine that this delightful confection is crafted with your health in mind, significantly reducing the sugar content without compromising on taste or texture. This is the promise of the Diabetic Vanilla Cream Roll. It’s a testament to the fact that special diets need not mean saying goodbye to the joys of baking and indulging. This recipe is a celebration of flavor and creativity, adapted from classic techniques to be accessible and, most importantly, enjoyable for everyone, including those managing diabetes . Whether for a holiday gathering, a birthday, or a simple weekend treat, this vanilla cream roll is sure to bring smiles to the table.
History
The cream roll, also known as a Swiss roll, jelly roll, or roulade, has a history as layered as its form. Its origins are often debated, but it is widely believed to have emerged in Central Europe during the 19th century. The concept of rolling a thin cake around a filling was a brilliant culinary innovation, allowing for a portable and visually stunning dessert. The term “Swiss Roll” is a bit of a mystery, as the cake isn’t specifically Swiss; it was likely a name that gave it a sense of foreign sophistication in other countries like England and the United States.
Traditional recipes, however, are notoriously high in sugar, which is crucial for stabilizing the egg foam and sweetening the cream. The evolution into a “diabetic” version is a much more recent development, born from the need to adapt beloved classics for modern dietary requirements. This adaptation focuses on using alternative sweeteners and lighter filling ingredients to replicate the original’s charm, allowing a new generation to enjoy a timeless dessert .
The Lovers
This dessert is dedicated to:
· The Health-Conscious Sweet Tooth: For those who refuse to let dietary restrictions dull the sparkle of dessert time.
· The Creative Home Baker: Who loves the challenge of adapting classic techniques.
· The Supportive Family Member: Who wants to create inclusive treats for loved ones with diabetes, ensuring no one feels left out during celebrations .
· Anyone Seeking a Lighter Indulgence: Who appreciates a dessert that is elegant, portion-controlled, and made with wholesome ingredients.
Benefits
Choosing to make this Diabetic Vanilla Cream Roll comes with several advantages:
· Blood Sugar Management: By utilizing sugar substitutes like Splenda and relying on the natural sweetness of other ingredients, this dessert is designed to have a lower glycemic impact than traditional cream rolls, helping to prevent sharp spikes in blood sugar levels .
· Portion Control: The classic “roll” format is naturally sliced into individual servings, making it easy to manage portion sizes, a key aspect of diabetic meal planning .
· Reduced Fat and Calories: The recipe uses egg whites for the cake structure and opts for low-fat fillings, such as part-skim ricotta or low-fat evaporated milk, significantly cutting down on saturated fat and overall calories .
· Nutritional Value: Ingredients like eggs provide high-quality protein, and using low-fat dairy products adds calcium without the excess fat .
· Psychological Well-being: Perhaps most importantly, it allows for the enjoyment of a beautiful, traditional dessert, contributing to a balanced and happy relationship with food.
Formation
This section breaks down the science and art of creating the perfect roll. The process is a beautiful interplay of structure and flexibility.
· The Sponge (Formation): The cake’s structure comes from whipped egg whites. Beating them with a sugar substitute until stiff peaks form creates a stable foam of air bubbles. When you gently fold in the dry ingredients (flour, baking powder), you are coating these bubbles with structure. The heat of the oven sets this structure, creating a light and flexible cake that can be rolled without breaking .
· The Roll (Information): Rolling the cake while it’s still warm is a critical step. This “trains” the sponge to hold a curved shape. Wrapping it in a towel sprinkled with a little flour or cocoa powder prevents it from sticking and allows it to cool in its rolled form, setting its “memory” so it won’t crack when you fill it later .
· The Filling (Formulation): The filling must be thick, creamy, and stable. By using low-fat ricotta or stabilized whipped evaporated milk, you create a rich-tasting cream that provides the perfect textural contrast to the light sponge without being overly heavy or sugary .
The Complete Recipe: Diabetic Vanilla Cream Rolls
This recipe combines the best elements of the searched recipes, adapted for a pure vanilla flavor.
Equipment Needed
· 15.5 x 10.5 x 1-inch jelly-roll pan
· Parchment paper or waxed paper
· Nonstick cooking spray
· Electric mixer (hand or stand mixer)
· Two mixing bowls (one large, one small)
· Rubber spatula
· Clean kitchen towel
· Wire cooling rack
· Small bowl for the filling
· Strainer (for dusting)
Ingredients
For the Vanilla Sponge Cake:
· 4 large eggs, separated
· 1/4 cup granulated sugar (divided use)
· 2 tablespoons sugar substitute (equivalent to about 6 packets, like Splenda or Sweet’n Low)
· 1/4 cup water
· 2 teaspoons pure vanilla extract (use a good quality for the best flavor)
· 1/2 cup cake flour (sifted; cake flour ensures a tender crumb)
· 1 teaspoon baking powder
· 1/8 teaspoon salt
For the Vanilla Cream Filling:
· 1 1/2 teaspoons unflavored gelatin
· 5 teaspoons cold water
· 1 can (12 oz) low-fat evaporated milk
· 2 tablespoons sugar substitute (or to taste, like Splenda)
· 1 teaspoon vanilla extract
· (Optional: 2 tablespoons sugar-free vanilla or strawberry jam for an extra layer of flavor)
For Dusting:
· 1 tablespoon granulated sugar substitute (like Splenda) or 1 teaspoon unsweetened cocoa powder (for a different look)
Detailed Instructions & Methods
Timing: Prep: 30 mins | Chill: 2 hours | Total: ~2.5 hours
Servings: Makes about 10-12 slices
Part 1: The Sponge Method
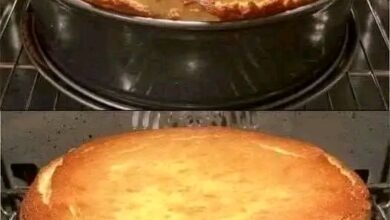
1. Preparation: Preheat your oven to 375°F (190°C). Spray your jelly-roll pan with nonstick cooking spray. Line it precisely with parchment paper, then lightly spray the paper. This double-coating guarantees the delicate cake will release perfectly .
2. Whip the Egg Whites: In a small, clean bowl, beat the 4 egg whites with an electric mixer until soft peaks form. Gradually add 2 tablespoons of the granulated sugar and continue beating until stiff, glossy peaks form. Set aside .
3. Create the Base: In a large bowl, beat the 4 egg yolks with the remaining 2 tablespoons of granulated sugar and the 2 tablespoons of sugar substitute. Beat until the mixture is thick and has turned a pale lemon color. This step incorporates air and dissolves the sweeteners.
4. Add Liquids and Dry Ingredients: Beat the water and 2 teaspoons of vanilla extract into the yolk mixture. In a separate small bowl, whisk together the cake flour, baking powder, and salt. Gradually add this dry mixture to the yolk mixture, mixing on low speed just until combined. Be careful not to overmix.
5. The Fold: This is the most critical step for a light cake. Gently fold about one-third of the whipped egg whites into the yolk-flour mixture to lighten it. Then, carefully fold in the remaining egg whites. Use a rubber spatula to cut down through the center of the batter, scrape along the bottom of the bowl, and bring the batter up and over. Rotate the bowl and repeat until no white streaks remain. The goal is to deflate the egg whites as little as possible .
6. Bake: Gently spread the batter evenly into your prepared pan. Bake for 12-15 minutes, or until the cake is golden and springs back when lightly touched in the center .
Part 2: The Shaping Method
1. The Initial Roll: While the cake bakes, lay a clean kitchen towel flat on your counter and sprinkle it evenly with 1 tablespoon of granulated sugar substitute (this prevents sticking). As soon as the cake comes out of the oven, immediately invert it onto the prepared towel. Carefully peel off the parchment paper .
2. Roll While Warm: Starting from one of the short ends, use the towel to help you tightly roll the cake up, towel and all. Place the rolled cake (seam-side down) on a wire rack to cool completely. This is the “memory” step; cooling it in this rolled shape will prevent it from cracking later .
Part 3: The Filling Method
1. Prepare the Gelatin: While the cake cools, make the filling. In a small bowl, sprinkle the gelatin over the 5 teaspoons of cold water. Let it stand for 5 minutes to soften .
2. Heat the Milk: Pour the low-fat evaporated milk into a small saucepan. Heat it over medium heat until it is lukewarm (do not boil). Alternatively, you can heat it in a microwave-safe bowl for about 45 seconds.
3. Dissolve and Chill: Remove the milk from the heat and stir in the softened gelatin mixture until it is completely dissolved. Pour the mixture into a bowl, cover, and refrigerate for about 1-2 hours, or until it has the consistency of raw egg whites—thick but not set .
4. Whip the Cream: Once the milk-gelatin mixture is at the correct consistency, remove it from the fridge. Add the 2 tablespoons of sugar substitute and the 1 teaspoon of vanilla extract. Using an electric mixer, beat the mixture until it becomes light, fluffy, and has tripled in volume, resembling whipped cream. This is your vanilla cream filling .
Part 4: The Final Assembly
1. Unroll and Fill: Once the cake is completely cool, gently unroll it. If using, spread a thin layer of sugar-free vanilla or strawberry jam evenly over the cake. Then, spread the vanilla cream filling over the jam, leaving a small border around the edges .
2. Re-roll and Chill: Carefully re-roll the cake, this time without the towel. Use the towel to help lift and guide the cake if needed, but do not roll it inside. Place the roll seam-side down on a serving platter. Cover loosely with plastic wrap and refrigerate for at least 1 hour to allow the filling to set completely, which makes slicing much easier.
3. Serve: Just before serving, use a strainer to dust the top of the roll lightly with a final sprinkle of granulated sugar substitute for a beautiful, snow-capped finish . Slice with a sharp knife, wiping the blade clean between cuts for neat, pretty slices.
Nutrition Information
Please note: This is an estimate based on the ingredients listed and can vary based on specific brands and measurements. For personalized dietary advice, please consult a nutritionist or doctor .
Nutrient Approximate Amount Per Slice (based on 12 slices)
Calories ~115-130
Total Fat ~2g
Saturated Fat ~1g
Cholesterol ~70mg
Sodium ~95mg
Total Carbohydrates ~15g
Dietary Fiber ~0g
Total Sugars ~7g (from milk and added sugar)
Added Sugars ~4g
Protein ~6g
Exchanges/Choices: Approximately 1 Starch, 1/2 Lean Meat, 1/2 Fat .
Conclusion
Creating a Diabetic Vanilla Cream Roll is more than just following a recipe; it’s an act of culinary love and inclusivity. It proves that dessert is a universal language of joy, adaptable to meet the needs of any table. From the gentle folding of the egg whites to the satisfying final roll, each step connects you to a tradition of baking that values both flavor and well-being. The result is a dessert that is as beautiful to look at as it is guilt-free to eat—a perfect swirl of creamy vanilla and light sponge that everyone can enjoy. So, preheat your oven, gather your ingredients, and get ready to create a masterpiece that is both a treat for the palate and a kindness to the body. Happy baking