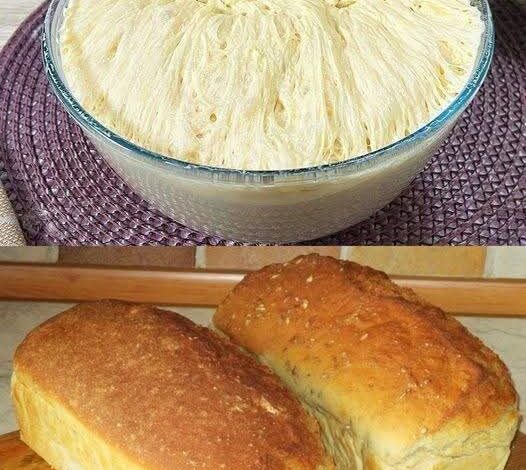
There’s something magical about pulling a golden, butter-glazed loaf from your oven—the aroma alone transports you to a French boulangerie. This Warm Butter Yeast Bread recipe delivers that bakery-quality experience right in your kitchen, with a soft, tender crumb and rich flavor that makes it “better than bakery” indeed.
🍞 Warm Butter Yeast Bread: Better Than Bakery
Introduction
There is perhaps no aroma more welcoming than that of freshly baked bread wafting through a home. This Warm Butter Yeast Bread recipe captures that magic, delivering a loaf with a golden, buttery crust and a soft, tender interior that truly lives up to its claim of being “better than bakery.” The secret lies in the generous amount of butter incorporated into the dough, which enriches every slice with a subtle sweetness and velvety texture. Whether you are a seasoned baker or a beginner taking your first steps into the world of yeast baking, this recipe is designed to be approachable and rewarding. The process of mixing, kneading, and watching the dough transform into a beautiful loaf is not just about creating food; it is a therapeutic and satisfying experience that connects us to one of humanity’s oldest culinary traditions . This bread is perfect for toast, sandwiches, or simply enjoyed warm with an extra pat of butter melting into its crumb.
Recipe Information
· Prep Time: 20 minutes
· Rise Time: 1 hour 45 minutes (first rise 1 hour, second rise 45 minutes)
· Bake Time: 30-35 minutes
· Total Time: Approximately 2 hours 40 minutes
· Servings: 12 slices
· Yield: 1 standard 9×5-inch loaf
Ingredients
Ingredient Quantity Notes
All-purpose flour 3 ½ cups Spoon and level for accuracy
Instant yeast 1 packet (2 ¼ teaspoons) Can substitute active dry yeast (see notes)
Granulated sugar ¼ cup Feeds the yeast and adds subtle sweetness
Salt 1 teaspoon Enhances flavor and controls yeast activity
Warm milk 1 cup Heated to about 110°F (43°C)
Unsalted butter ½ cup (1 stick) Melted, plus extra for greasing and brushing
Large eggs 2 Room temperature for best incorporation
Vanilla extract 1 teaspoon Optional, adds a warm undertone
Note: If using active dry yeast instead of instant, proof it first by combining with the warm milk and a pinch of sugar for 5-10 minutes until frothy .
Instructions
Step 1: Prepare the Dough
In a large mixing bowl, whisk together the flour, instant yeast, sugar, and salt until well combined. In a separate bowl or large liquid measuring cup, mix the warm milk, melted butter, eggs, and vanilla extract .
Step 2: Combine Wet and Dry Ingredients
Pour the wet ingredients into the dry ingredients. Stir with a wooden spoon or a sturdy spatula until a shaggy dough forms and no dry patches of flour remain. The dough will be soft and slightly sticky .
Step 3: Knead the Dough
Turn the dough out onto a lightly floured surface. Knead for 8-10 minutes. To knead, use the heel of your hand to push the dough away from you, fold it back over itself, give it a quarter turn, and repeat. The dough is ready when it becomes smooth, elastic, and springs back slowly when poked with a finger. If the dough is excessively sticky, add flour one tablespoon at a time, but be careful not to add too much, as this can make the bread dense .
Step 4: First Rise (Fermentation)
Place the kneaded dough into a lightly greased bowl (use butter or a neutral oil). Turn the dough once to coat it in the fat, which prevents it from drying out. Cover the bowl tightly with plastic wrap or a clean, damp kitchen towel. Place it in a warm, draft-free spot and let it rise until doubled in size, about 1 hour . A good spot could be an oven with the light on (but not turned on) or on a countertop away from windows.
Step 5: Shape the Dough and Second Rise
Gently punch down the risen dough to release the air bubbles. Transfer it to a lightly floured surface. Pat or roll it into a rectangle roughly 8×12 inches. Starting from the short end, roll the dough tightly into a log, pinching the seam to seal. Place the loaf seam-side down into a greased 9×5-inch loaf pan. Cover the pan loosely with the kitchen towel and let it rise for another 30-45 minutes, or until the dough has risen about 1 inch above the rim of the pan .
Step 6: Bake the Bread
While the dough is in its final rise, preheat your oven to 350°F (175°C). Once the dough has risen, place it on the middle rack and bake for 30-35 minutes. The bread is done when it is deep golden brown on top and sounds hollow when tapped on the bottom. For an extra soft crust, you can brush the hot loaf with a little melted butter as soon as it comes out of the oven .
Step 7: Cool
Let the bread cool in the pan for about 10 minutes. This allows it to set and makes it easier to remove. After 10 minutes, turn the loaf out onto a wire rack to cool completely before slicing. This final cooling step is crucial, as slicing into a piping hot loaf can result in a gummy texture .
Methods and Techniques
The success of this bread hinges on a few key methods. First, the activation of yeast, even when using instant yeast, is supported by the warm milk, which creates an ideal environment for the yeast to begin fermenting. Second, kneading is critical for developing gluten, the protein network that gives bread its structure and chewy texture. Proper kneading transforms a sticky mass into a smooth, elastic dough capable of trapping the carbon dioxide produced by the yeast . The process involves two proofing (rising) stages. The first bulk fermentation develops flavor and strength. The second rise, after shaping, ensures the final loaf is light and airy. Finally, baking at the correct temperature sets the crust and cooks the interior. Adding a small pan of water to the oven during baking can create steam, which helps develop a shinier, crispier crust .
The History of Yeasted Bread
The story of leavened bread is a story of discovery and science. While flatbreads have been made for over 14,000 years, the first evidence of fermented, or risen, bread is much more recent. For decades, historians pointed to Ancient Egypt around 1500 BCE as the birthplace of leavened bread . However, a remarkable discovery in 2024 pushed that date back significantly. Archaeologists in Çatalhöyük, Türkiye, unearthed a spongy, hand-sized bread remnant dated to around 6600 BCE, making it the oldest known fermented bread in the world . This Neolithic find suggests that the accidental fermentation of dough, likely from wild yeasts, has been a part of human history for over 8,600 years. For millennia, bakers relied on natural starters and the yeast from beer brewing (known as “barm”) to leaven their bread. It wasn’t until the 19th century that the Vienna Process helped develop methods for cultivating and harvesting specific strains of Saccharomyces cerevisiae, the yeast we know today as baker’s yeast, leading to the consistent, quick-rising loaves we now enjoy .
Nutritional Information
The nutritional values below are estimates for one slice of this buttery bread, based on a standard 12-slice loaf.
Nutrient Amount per Serving
Calories 180 kcal
Total Fat 7 g
Saturated Fat 4 g
Cholesterol 40 mg
Sodium 150 mg
Total Carbohydrates 28 g
Dietary Fiber 1 g
Sugars 4 g
Protein 4 g
Note: Nutritional information is estimated and can vary based on specific ingredients used .
Health Benefits and Considerations
Beyond its delicious taste, this homemade yeast bread offers several benefits over store-bought varieties. By baking at home, you have complete control over the ingredients, avoiding the preservatives, dough conditioners, and high levels of sugar and salt often found in commercial bread .
Furthermore, the yeast fermentation process itself has benefits. The yeast, Saccharomyces cerevisiae, breaks down some of the complex carbohydrates and proteins during the rising process, which can make the bread easier to digest. Recent scientific studies are also exploring the potential health benefits of specific yeast strains. For example, research has investigated the use of a particular strain of S. cerevisiae in bread to create a functional food that may help modulate the immune system and reduce airway inflammation in models of allergic asthma, though this research is still in its early stages . Making bread at home allows you to create a wholesome product that is not only nourishing but also free from artificial additives.
The Formation of the Loaf: From Dough to Bread
The transformation of a few simple ingredients into a beautiful loaf is a fascinating process. It all begins with hydration, where the warm milk brings the dry ingredients together. As you mix and knead, the proteins glutenin and gliadin in the flour combine to form gluten, creating an elastic network . This network is the scaffolding that will hold the bread together.
The magic of the rise is powered by fermentation. The yeast consumes the sugars in the flour and the added sugar, producing carbon dioxide gas and ethanol as byproducts. The gluten network traps these gas bubbles, causing the dough to inflate . During baking, this process accelerates in what is called oven spring, a final burst of rise before the heat kills the yeast. The heat also sets the structure of the gluten and starches, turning the fluid dough into a solid, airy crumb. Simultaneously, Maillard browning and caramelization occur on the surface, creating the flavorful, golden-brown crust . This entire sequence is a beautiful example of chemistry and biology working in harmony.
Why Bread Lovers Adore This Recipe
This bread earns its “better than bakery” reputation for several reasons. Flavor is paramount—the generous amount of butter and the hint of vanilla create a richness that is simply unmatched by basic white bread. The texture is another triumph; it is incredibly soft, fluffy, and tender, with a moist crumb that stays fresh for days .
For the home baker, its reliability is a major draw. This recipe is straightforward and uses simple, accessible ingredients. It builds confidence, proving that anyone can create something spectacular from scratch. Finally, there is the sheer versatility. It makes the most decadent French toast, the perfect base for a grilled cheese sandwich, or is sublime simply toasted with jam. It is a recipe that bread lovers come back to again and again, a staple that feels special every single time.
Conclusion
This Warm Butter Yeast Bread is more than just a recipe; it is an invitation to slow down and engage in the timeless craft of baking. From the simple act of mixing flour and milk to the profound satisfaction of pulling a golden loaf from your oven, the process is deeply rewarding. The result is a bread of exceptional quality—tender, buttery, and fragrant—that genuinely rivals anything from a professional bakery. Whether you share it with loved ones or savor it yourself, this loaf brings a touch of warmth and homemade goodness to your table. So preheat your oven, gather your ingredients, and discover the joy of creating the perfect loaf.
Bread Lovers Unite
This recipe has a way of bringing people together, much like the bread itself. It is for the weekend baker looking for a project, the parent wanting to fill their home with a comforting aroma, and the food enthusiast searching for that perfect, simple loaf. There is a global community of home bakers who find joy in this exact process, sharing tips and photos of their perfectly risen dough. We encourage you to join their ranks. Make this bread, share it with someone you love, and become a part of the timeless tradition of breaking bread together.