The Alchemy of Sweetness: Homemade Sweetened Condensed Milk
A Heartfelt Introduction
Sweetened condensed milk is more than just a can in your pantry; it’s a culinary magic trick. It’s the secret behind velvety key lime pies, the rich backbone of Vietnamese iced coffee, and the golden ribbon in dulce de leche. Making it from scratch transforms simple milk and sugar into a thick, luxuriously sweet syrup, giving you complete control over flavor and purity. This recipe isn’t just about replication—it’s about creation, offering a superior, customizable version of the store-bought classic.
A Rich History: From Necessity to Global Staple
The story of condensed milk begins with practicality. In the early 19th century, Frenchman Nicolas Appert pioneered food preservation through canning. American Gail Borden Jr., inspired after witnessing shipboard milk spoilage, perfected the method of evaporating milk and adding sugar (a natural preservative). Patented in 1856, his invention provided a shelf-stable, safe dairy product for soldiers, explorers, and growing urban populations. It traveled across the world, embedding itself into the culinary DNA of cultures from Brazil (brigadeiros) to Southeast Asia (condensed milk toast).
The Benefits of Homemade
· Purity & Control: No stabilizers, additives, or preservatives. Just real ingredients.
· Customization: Infuse with vanilla bean, cinnamon, or a pinch of sea salt. Use organic or alternative milks.
· Flavor Depth: The slow-cooked, caramelized notes are far more complex than canned versions.
· Satisfaction: There’s a profound joy in creating a pantry staple from scratch.
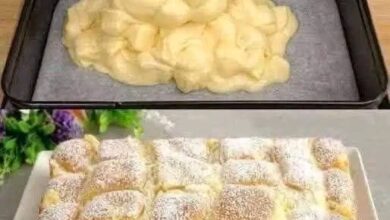
Homemade Sweetened Condensed Milk Recipe
Ingredients
· 4 cups (950 ml) whole milk (for richest results; 2% can be used)
· 1 ½ cups (300g) granulated white sugar
· 4 tablespoons (56g) unsalted butter
· 1 teaspoon pure vanilla extract (or 1 vanilla bean, split and scraped)
· Optional: A pinch of salt to enhance flavor
Equipment
· Heavy-bottomed, large saucepan (prevents scorching)
· Whisk
· Heat-resistant spatula
· Instant-read thermometer (optional but helpful)
· Sterilized glass jar for storage
Instructions & Methods
Method 1: The Standard Simmer (The Primary Method)
1. Combine & Dissolve: In your heavy-bottomed saucepan, combine the milk and sugar. Warm over medium heat, whisking constantly, until the sugar is fully dissolved.
2. Simmer & Reduce: Bring the mixture to a gentle simmer. DO NOT BOIL RAPIDLY. Reduce heat to low-medium to maintain a steady, gentle simmer.
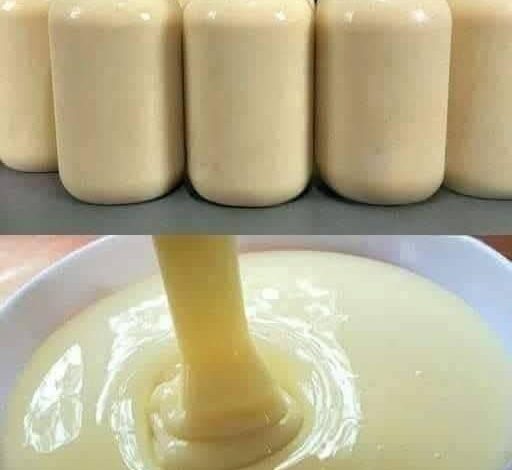
3. The Slow Thicken: Cook for 45-60 minutes, stirring frequently (especially as it thickens) to prevent sticking and scorching on the bottom. The mixture will slowly reduce by about half. It’s ready when it coats the back of a spoon and, when a line is drawn through it, the line holds.
4. Finish & Store: Remove from heat. Whisk in the butter, vanilla extract, and optional salt until fully incorporated and glossy. Let cool slightly before pouring into your sterilized jar. It will thicken significantly as it cools. Store in the refrigerator for up to 2 weeks.
Method 2: The Speedy Shortcut (Using Milk Powder)
· For a quicker version: Blend 1 cup milk powder, ⅔ cup sugar, ⅓ cup hot water, and 3 tbsp melted butter until smooth. Heat briefly on the stove until sugar dissolves. Use immediately or store. Texture is slightly less unctuous but works well in baked applications.
Formation & The Science
The magic lies in evaporation and concentration. As water cooks out of the milk, the sugars (lactose and sucrose) become super-concentrated. This high-sugar environment, along with the Maillard reaction (browning of milk proteins), creates the characteristic color, thick body, and deep, caramelized flavor. The added butter contributes to a rich mouthfeel and smooth texture upon cooling.
Nutritional Profile (Per Tablespoon Estimate)
· Calories: ~65 kcal
· Carbohydrates: 11g (primarily sugars)
· Fat: 2g
· Protein: 1g
· Calcium: 4% DV
· Note: This is a high-energy, sweet ingredient best used as a component in desserts or flavoring, not consumed in large quantities.
For The True Lovers: How to Use Your Creation
· The Baker: Use cup-for-cup in pies (key lime, pumpkin), fudge, magic cookie bars, and flan.
· The Beverage Connoisseur: Stir a spoonful into coffee, tea, or hot chocolate. Drizzle over iced coffee.
· The Global Foodie: Make Vietnamese cà phê sữa đá, Brazilian brigadeiros, or Thai sticky rice with mango.
· The Ice Cream Fanatic: Swirl it into homemade ice cream as a ripple or use it as the base for no-churn ice cream.
· The Simple Hedonist: Drizzle over fresh fruit, pancakes, or yogurt. Spread it on toast with a sprinkle of cinnamon.
Conclusion
Homemade sweetened condensed milk is a testament to the beauty of simple ingredients transformed by patience and heat. It connects us to a history of culinary innovation while empowering us in our modern kitchens. The process is meditative, the result is rewarding, and the applications are endless. Once you experience the profound difference in flavor and texture, that familiar can may just lose its place on your shelf. This recipe is an invitation to create, to sweeten your world on your own terms, and to share the rich, golden love that only comes from making it yourself.